Introduction
Who says you need an ice cream maker to enjoy a creamy, homemade frozen treat? With this easy snow cream recipe, you can turn freshly fallen snow into a delicious, fluffy dessert in just minutes! Using simple ingredients like milk, sugar, and vanilla, this wintertime favorite is a fun and nostalgic way to make the most of a snowy day.
Snow cream is a simple, homemade ice cream made using fresh snow, milk or cream, sugar, and flavoring like vanilla extract. It’s a nostalgic winter treat that has been enjoyed for generations, bringing joy to kids and adults alike. Whether you’re making it for the first time or reliving childhood memories, this dessert is an easy and fun way to turn a snowy day into a sweet experience.
The best part? It only takes a few minutes to make! With just a handful of ingredients, you can whip up a creamy, flavorful snow cream that’s customizable with your favorite toppings like chocolate syrup, sprinkles, or fruit. It’s a perfect activity for families, especially when snow days keep everyone indoors.
In this guide, you’ll learn:
- What makes snow cream different from traditional ice cream.
- A step-by-step recipe to make the creamiest snow cream at home.
- Expert tips to ensure the best texture and flavor.
So grab a bowl, step outside to collect some fresh snow, and let’s make a delicious homemade snow cream together!
What is Snow Cream and Why You’ll Love It?
A Winter Treat with a Twist
When you think of ice cream, you probably picture scooping it from a store-bought tub or churning it in an ice cream maker. But what if you could create a creamy, delicious dessert using nature’s own ingredient—fresh snow? That’s exactly what snow cream is all about!
Unlike traditional ice cream, which requires cooking a custard base or using special equipment, snow cream is incredibly simple to make. With just a few ingredients—freshly fallen snow, milk or cream, sugar, and vanilla extract—you can whip up a delightful frozen treat in minutes. The result? A light, fluffy, and slightly icy dessert that melts in your mouth, offering a fun and refreshing contrast to the chilly winter air.
Here’s your refined section with outbound links incorporated naturally:
A Winter Treat with a Twist
When you think of ice cream, you probably picture scooping it from a store-bought tub or churning it in an ice cream maker. But what if you could create a creamy, delicious dessert using nature’s own ingredient—fresh snow? That’s exactly what snow cream is all about!
Unlike traditional ice cream, which requires cooking a custard base or using special equipment, snow cream is incredibly simple to make. With just a few ingredients—freshly fallen snow, milk or cream, sugar, and vanilla extract—you can whip up a delightful frozen treat in minutes. The result? A light, fluffy, and slightly icy dessert that melts in your mouth, offering a fun and refreshing contrast to the chilly winter air.
What Makes Snow Cream Unique?
✔️ Instant and effortless – No churning, no freezing, no waiting—just mix and enjoy!
✔️ A fun seasonal experience – Since you can only make it when there’s fresh snow, it becomes a special winter tradition. (Learn more about the history of snow cream.)
✔️ Highly customizable – Add your favorite flavors, from chocolate syrup and sprinkles to dairy-free options like coconut or almond milk. (Try these dairy-free snow cream variations.)
✔️ A nostalgic treat – Many people have fond childhood memories of scooping up clean snow and turning it into something delicious. (Discover fun snow day activities to make winter even more magical.)
Since fresh snow is the star ingredient, it’s important to collect it safely. (Check out this guide on how to gather clean snow for snow cream.) Whether you’re introducing this winter tradition to your kids or reliving your own childhood memories, snow cream is a sweet and playful way to embrace the magic of winter.
So, the next time snow starts falling, grab a bowl and a spoon—it’s time to create your own winter wonderland dessert! (For extra flavor, explore the best toppings for snow cream.)
Fun for the Whole Family
One of the best things about making snow cream is that it’s not just a dessert—it’s an experience! Unlike traditional ice cream, which requires patience and special equipment, snow cream is quick, easy, and fun for all ages. It turns a snowy day into an opportunity for family bonding and creativity in the kitchen.
An Interactive Winter Activity
Kids love the idea of gathering fresh snow and turning it into something delicious. From scooping up the soft, powdery snow to mixing in the ingredients, every step is hands-on and exciting. Parents and grandparents can share childhood memories of making homemade snow cream, passing down a simple but joyful tradition.
A Great Way to Get Creative
One of the most enjoyable aspects of snow cream is that it’s completely customizable! Let each family member make their own version by adding fun mix-ins and toppings. Here are some ideas:
- Chocolate Lovers: Stir in cocoa powder or drizzle with chocolate syrup.
- Fruity Delight: Mix in crushed berries or top with banana slices.
- Candy Craze: Add sprinkles, mini marshmallows, or crushed cookies for extra fun.
- Dairy-Free Options: Use coconut milk or almond milk instead of regular dairy.
A Quick and Easy Treat for Busy Parents
Parents will love how effortless snow cream is to make. With just a few simple ingredients and no cooking required, it’s a stress-free way to bring smiles to the whole family. In under 10 minutes, you have a homemade, creamy, and refreshing dessert—straight from nature!
So, the next time snow starts falling, gather your family, head outside, and turn that winter wonderland into a sweet, memorable experience with homemade snow cream!
Only a Few Ingredients Needed
One of the best things about snow cream is how incredibly simple it is to make. Unlike traditional ice cream, which often requires eggs, heavy cream, and an ice cream maker, snow cream comes together with just a handful of basic ingredients—most of which you probably already have in your kitchen!
Here’s what you’ll need:
1. Fresh Snow
- The star of the recipe! You’ll want clean, freshly fallen snow that hasn’t been packed down or touched.
- For best results, collect the snow in a clean bowl or container as soon as it falls. Avoid snow that has been sitting on the ground too long.
- If fresh snow isn’t available, you can crush ice finely as a substitute, but nothing beats real snow for the fluffiest texture!
2. Milk or Cream
- To achieve that creamy consistency, you’ll need a liquid base like whole milk, heavy cream, or half-and-half.
- For extra richness, use sweetened condensed milk instead—it adds both creaminess and sweetness in one step!
- Dairy-Free Options: If you prefer a plant-based version, use coconut milk, almond milk, or oat milk for a delicious twist.
3. Sweetener
- Classic granulated sugar works well, but you can also use powdered sugar, honey, maple syrup, or even sweetened condensed milk for a smoother texture.
- Adjust the amount based on your personal preference—some like it lightly sweet, while others prefer a more indulgent taste.
4. Vanilla Extract (or Other Flavorings)
- Vanilla extract is the most common flavoring, adding a warm, classic taste.
- Want to mix things up? Try adding:
- Cocoa powder for a chocolate snow cream.
- Almond or peppermint extract for a unique twist.
- Cinnamon or nutmeg for a warm, spiced flavor.
5. Toppings (Optional, But Fun!)
- Customize your snow cream with chocolate syrup, sprinkles, crushed cookies, fruit, or even a drizzle of caramel.
- For extra crunch, add chopped nuts or cereal for a fun texture.
With just these few simple ingredients, you can whip up a delightful, homemade winter dessert in minutes. The best part? You can easily tweak the recipe to suit your taste and dietary preferences, making snow cream a fun and versatile treat for everyone!
The Best Snow Cream Recipe – Step-by-Step Guide
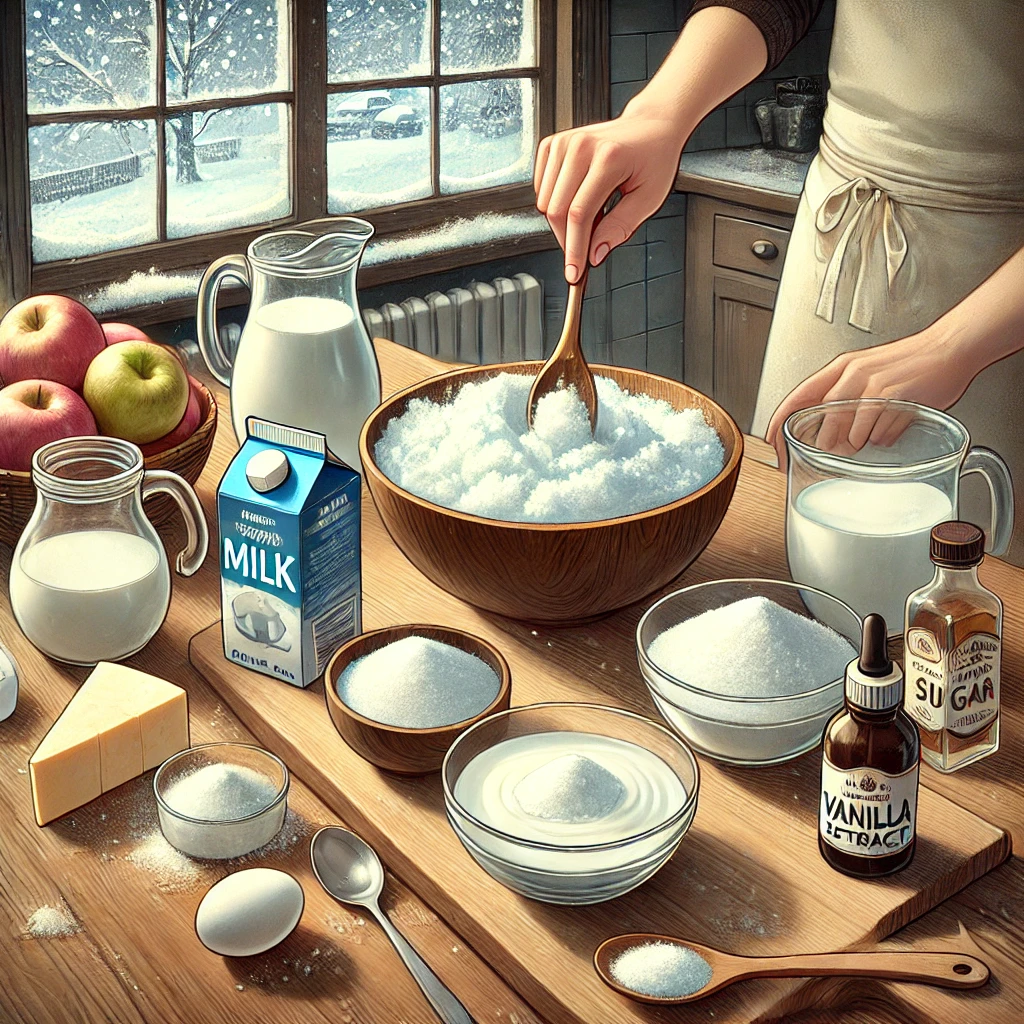
Gather Your Ingredients
Before you start making your delicious homemade snow cream, it’s important to have all your ingredients ready. One of the best things about this winter treat is that it requires just a few simple ingredients, many of which you likely already have in your kitchen. Here’s what you need and some tips for choosing the best options!
1. Fresh Snow – The Star of the Recipe!
- The most important ingredient for snow cream is, of course, freshly fallen snow.
- Make sure to collect clean, untouched snow from a safe area—preferably away from roads, rooftops, or areas where animals roam.
- The fluffier the snow, the better! Fresh snow has a light and airy texture, which helps create a creamy consistency.
- Tip: If you’re expecting snowfall, place a large, clean bowl or pan outside ahead of time to catch fresh snow as it falls!
2. Milk or Cream – For That Creamy Goodness
- The liquid base of your snow cream is what gives it a smooth, creamy texture.
- You can use:
- Whole milk – A common choice that balances creaminess and lightness.
- Heavy cream or half-and-half – For an extra rich and indulgent texture.
- Sweetened condensed milk – A great option that adds both sweetness and creaminess in one step.
- Dairy-Free Alternatives: If you prefer a plant-based version, use coconut milk, almond milk, or oat milk. Coconut milk, in particular, gives a rich, tropical twist to the flavor!
3. Sweetener – Adjust to Your Taste
- Classic granulated sugar works well, but there are other options, too:
- Powdered sugar – Dissolves quickly, making the snow cream extra smooth.
- Honey or maple syrup – Natural alternatives that add a unique depth of flavor.
- Sweetened condensed milk – If using this, you may not need additional sugar.
- Tip: Start with a small amount of sweetener and taste-test as you go—you can always add more if needed!
4. Vanilla Extract – For That Classic Flavor
- Vanilla extract is the most common flavoring for snow cream because it enhances the natural sweetness and adds a warm, comforting taste.
- You can also experiment with different flavors, such as:
- Almond extract – Adds a nutty, slightly sweet aroma.
- Peppermint extract – Perfect for a refreshing, wintery twist.
- Cocoa powder or melted chocolate – For a chocolate snow cream variation.
5. Optional Toppings – Make It Fun!
- Snow cream is delicious on its own, but adding toppings can take it to the next level. Some fun ideas include:
- Chocolate syrup or caramel drizzle
- Sprinkles or crushed cookies
- Fresh berries or banana slices
- Mini marshmallows or chopped nuts
By having all these ingredients ready before you start, you’ll be able to mix everything together quickly and easily, ensuring your snow cream is at its freshest and fluffiest. Now that your ingredients are gathered, let’s move on to making the creamiest snow cream ever!
How to Collect Fresh Snow Safely
Since snow cream is made with fresh, natural snow, it’s essential to collect it properly to ensure that it’s clean, safe, and free from contaminants. While snow may look pristine, not all of it is suitable for consumption. Here’s how to gather the best-quality snow for your homemade treat.
1. Wait for the Right Snowfall
- The best snow to use for snow cream is from a fresh, recent snowfall.
- Aim to collect snow after the first few hours of steady snowfall—this ensures that any pollutants or dust in the air have already settled before you start gathering.
- Avoid using snow from the first snowfall of the season, as it may contain impurities from the atmosphere that have built up over time.
2. Choose a Clean Collection Spot
Not all snow is created equal! Pick your collection spot carefully:
✅ Best places to gather snow:
- Open areas like a backyard, garden, or field, away from streets and sidewalks.
- Snow that has just fallen and hasn’t been walked on or touched.
- Snow caught in a clean bowl, container, or baking sheet that was placed outside before the snowfall.
❌ Places to AVOID collecting snow from:
- Near roads, driveways, or sidewalks – These areas can have dirt, salt, and vehicle exhaust residue.
- On the ground near buildings or trees – Snow here may contain falling debris or animal traces.
- Snow that has been sitting for too long – The fresher, the better!
3. Use the Top Layer Only
- When scooping snow, always take from the top layer and avoid the snow touching the ground.
- Gently scrape off the top few inches, as the very surface may contain airborne dust.
- Tip: Collect snow in a large, clean mixing bowl or food-safe container to prevent contamination.
4. Store Snow Properly If Needed
If you’re not using the snow immediately, you can:
- Keep it outside in a covered bowl if temperatures are below freezing.
- Store it in the freezer in an airtight container for later use.
- Avoid overpacking the snow—keeping it light and fluffy makes for a smoother snow cream texture.
Final Safety Tip: When in Doubt, Don’t Use It
If you’re unsure about the cleanliness of the snow, it’s better to err on the side of caution. Instead, you can make a similar icy treat by finely crushing ice and following the same recipe!
By following these guidelines, you’ll ensure that your snow cream is delicious, safe, and made with the purest snow possible. Now that you have your fresh snow, let’s move on to mixing the perfect snow cream!
Mixing the Perfect Snow Cream
Now that you have your fresh, clean snow and ingredients ready, it’s time to mix up a batch of deliciously creamy homemade snow cream. The key to getting the perfect texture is working quickly and following a few simple steps. Here’s how to do it!
1. Gather Your Ingredients and Work Fast
- Snow melts quickly, especially when mixed with liquid ingredients. To keep your snow cream light and fluffy, make sure to:
✅ Have all your ingredients pre-measured and ready to go.
✅ Mix everything in a chilled bowl to help keep the snow from melting too fast.
✅ Work quickly, but don’t rush—gentle mixing is key to maintaining the right texture.
2. Add Your Liquid Ingredients Gradually
- Start with about 8–10 cups of fresh snow in a large mixing bowl.
- Slowly drizzle in your milk or cream while stirring gently.
- Too much liquid too fast will turn the snow into slush instead of a creamy consistency.
- If using sweetened condensed milk, you may need less additional sweetener since it’s already sweet.
- Tip: Add liquid a little at a time, checking the texture as you go—stop once the mixture reaches your desired consistency.
3. Sweeten and Flavor to Taste
- Stir in sugar, maple syrup, or honey, adjusting the sweetness as needed.
- Mix in vanilla extract (or other flavorings like almond or peppermint) for a rich, aromatic taste.
- If you want a chocolate version, add cocoa powder or drizzle in melted chocolate while stirring.
4. Stir Gently to Keep It Fluffy
- Use a folding motion instead of vigorous stirring to keep the snow light and airy.
- If the mixture looks too runny, add a little more fresh snow until it thickens up.
- If the texture seems too icy, a splash of heavy cream can help smooth it out.
5. Serve Immediately for the Best Texture
- Snow cream is best enjoyed right away before it melts!
- Scoop it into bowls or cones and top with your favorite add-ins like:
- Chocolate syrup or caramel drizzle
- Sprinkles, crushed cookies, or mini marshmallows
- Fresh fruit like strawberries or bananas
Bonus Tip: Storing Leftovers (If Any!)
If you have extra snow cream, you can store it in the freezer in an airtight container. However, it may become hard and icy over time. To restore its creamy texture, let it thaw for a few minutes and stir well before serving.
By following these simple steps, you’ll get smooth, creamy, and perfectly balanced snow cream every time. Now, it’s time to grab a spoon and enjoy your homemade winter treat!
Dairy-Free and Flavor Variations
One of the best things about snow cream is how versatile it is! Whether you’re dairy-free, vegan, or just looking for fun new flavors, there are plenty of ways to customize your recipe. Here’s how you can make delicious dairy-free snow cream and experiment with different flavors to keep things exciting.
Dairy-Free Snow Cream Options
If you’re avoiding dairy, you can still enjoy creamy, flavorful snow cream by using plant-based alternatives. Here are some great substitutes:
1. Milk Alternatives
Instead of regular milk or heavy cream, try:
Coconut milk – Thick and creamy, with a subtle tropical taste. Full-fat coconut milk works best!
Almond milk – A light, slightly nutty alternative.
Oat milk – Naturally sweet and creamy, great for a smooth texture.
Cashew milk – Extra creamy, with a mild flavor.
Tip: If using a thinner milk, like almond or oat milk, start with less liquid and add slowly to prevent the snow from becoming too slushy.
2. Sweetener Alternatives
Instead of regular sugar, you can use:
Maple syrup – Adds a warm, caramel-like sweetness.
Agave syrup – A mild, plant-based alternative.
Honey (if not strictly vegan) – A natural way to add sweetness.
Fun Flavor Variations
Once you have the base recipe, you can get creative! Try these exciting flavor ideas:
1. Chocolate Snow Cream 🍫
Love chocolate? Try this version:
- Add 2–3 tablespoons of cocoa powder to the mix.
- Sweeten with sugar, honey, or maple syrup.
- Drizzle with chocolate syrup for extra richness!
2. Strawberry Snow Cream 🍓
For a fruity twist:
- Blend fresh or frozen strawberries into your milk alternative before mixing.
- Add a teaspoon of strawberry extract for extra flavor.
- Top with fresh strawberry slices!
3. Peppermint Snow Cream ❄️
Perfect for winter lovers:
- Add ½ teaspoon of peppermint extract.
- Crush some peppermint candies and mix them in.
- Top with chocolate chips for a mint-chocolate combo!
4. Peanut Butter Banana Snow Cream 🥜🍌
A creamy, nutty delight:
- Stir in a spoonful of peanut butter for richness.
- Mash or blend ½ a ripe banana into the milk before mixing.
- Sprinkle with chopped nuts for crunch!
5. Cookies & Cream Snow Cream 🍪
For Oreo lovers:
- Crush chocolate sandwich cookies and stir them into the mix.
- Add a drop of vanilla extract for extra flavor.
- Garnish with extra cookie crumbles on top!
Mix & Match Your Own Creations!
You can combine flavors and toppings to make your own unique version of snow cream. Try:
- Coconut-chocolate: Coconut milk + cocoa powder.
- Berry blast: Oat milk + mixed berries.
- Caramel delight: Almond milk + caramel drizzle.
With so many variations, every snow day can be a new snow cream adventure! ❄️🍦
Pro Tips for the Creamiest Snow Cream

Use Fresh Snow Quickly
One of the key secrets to making the perfect snow cream is using freshly fallen snow as soon as possible. Since snow is incredibly delicate and melts quickly, it’s important to gather and mix it immediately for the best texture and flavor. Here’s why and how to make sure you’re using it at its freshest!
Why You Should Use Snow Right Away
❄️ Melting Happens Fast – Snow is naturally light and fluffy, but once it starts melting, it becomes slushy and watery, making it difficult to achieve the creamy texture you want in snow cream.
❄️ Fluffiness is Key – The airy structure of fresh snow helps create a soft, scoopable consistency. If it sits too long, it compacts and loses that light, powdery feel.
❄️ Maintains Purity – The longer snow sits, the more likely it is to collect airborne dust, dirt, or other particles. Using it quickly ensures it stays clean and fresh.
How to Keep Snow Fresh While You Prepare
Since snow melts so fast, a little planning can make all the difference. Here’s how to keep it fresh while you get your ingredients ready:
Collect It Last – Gather your snow only after you’ve measured out your milk, sugar, and flavorings. That way, you can mix everything quickly.
Store It in the Freezer – If you need a few extra minutes, place the snow in a large bowl and pop it in the freezer to keep it from melting.
Chill Your Mixing Bowl – Using a cold bowl (place it in the freezer for a few minutes before mixing) helps prevent the snow from melting too quickly when you add liquid ingredients.
Work Quickly – Once you start mixing, stir gently and serve immediately for the best texture.
Can You Store Snow for Later?
If you want to make snow cream later but don’t want to miss out on the snowfall, you can store snow in the freezer:
- How to Store: Scoop fresh snow into a large, airtight container and freeze it. Avoid overpacking it, as this can cause it to turn into a solid ice block.
- Shelf Life: Fresh snow can be stored for a few hours, but after that, its texture changes, and it may not be as fluffy when you take it out.
- How to Use Stored Snow: If the snow becomes too hard, let it sit for a few minutes at room temperature, then fluff it up with a spoon before mixing.
Final Tip: Always Go for the Freshest Snow!
If possible, always use newly fallen snow rather than stored or older snow. The fresher the snow, the better the texture and taste of your snow cream! Now that you know how to use fresh snow quickly, it’s time to start mixing your delicious winter treat.
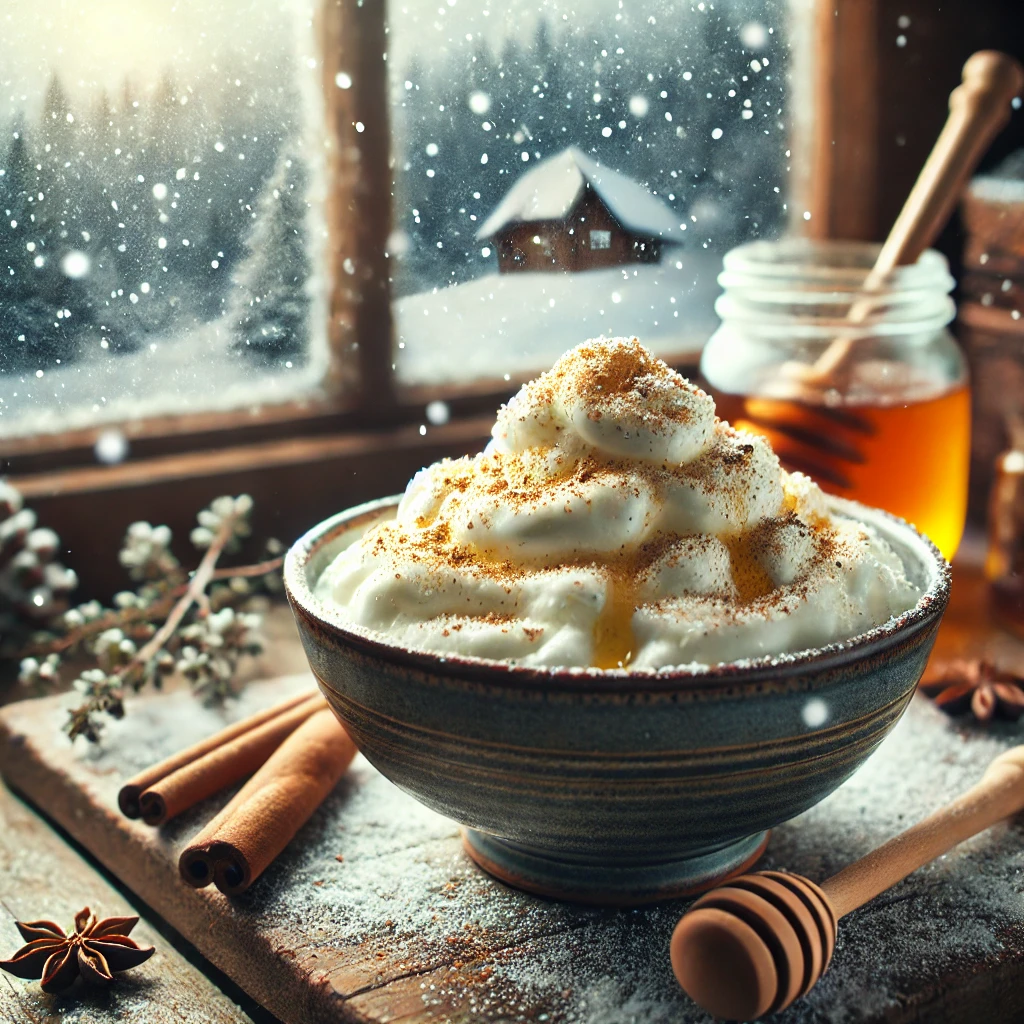
Adjust the Sweetness to Taste
One of the great things about making homemade snow cream is that you can customize the sweetness to match your personal preference. Whether you like it lightly sweetened or extra indulgent, adjusting the amount and type of sweetener is key to getting the perfect flavor.
1. Start with Less, Then Add More
Since different sweeteners have different levels of intensity, it’s always best to start with a small amount and gradually add more as needed.
- Begin with 2–3 tablespoons of sugar (or your preferred sweetener) for every 8–10 cups of snow.
- Stir well and taste-test—if it’s not sweet enough, add a little more, a teaspoon at a time.
- Remember that cold foods taste less sweet than room-temperature desserts, so you may need slightly more sweetener than you expect.
2. Choose the Right Sweetener
The type of sweetener you use can affect both flavor and texture. Here are some great options:
Classic Sweeteners
✅ Granulated Sugar – The most common choice, dissolves well in the snow but may take a little extra stirring.
✅ Powdered Sugar – Dissolves faster than granulated sugar and helps create a smoother texture.
Natural Sweeteners
🍯 Honey – Adds a subtle floral sweetness and a slightly thicker consistency.
🍁 Maple Syrup – A great option for a richer, more complex sweetness with a hint of caramel flavor.
🌿 Agave Syrup – A mild, plant-based alternative that blends well.
Sweetened Condensed Milk – Two-in-One
🥛 If you’re using sweetened condensed milk, you may not need extra sugar since it already provides both creaminess and sweetness.
3. Flavor Enhancers to Balance Sweetness
If your snow cream tastes too sweet, you can balance it out with:
- A pinch of salt – Helps cut through excess sweetness and enhances the overall flavor.
- A splash of lemon juice – Adds a touch of acidity to brighten the taste.
- Vanilla extract – Rounds out the flavor and makes the sweetness feel more natural.
4. Fun Variations for Unique Sweetness
Want to get creative? Try flavored sweeteners to add extra depth to your snow cream:
- Brown sugar – Gives a hint of caramel or molasses flavor.
- Coconut sugar – A less processed alternative with a mild toffee-like taste.
- Flavored syrups (like chocolate, caramel, or fruit syrups) for a customized dessert experience!
Final Tip: Let Everyone Customize Their Own!
If making snow cream for a group, start with a lightly sweetened base, then let each person add their own sweetener to taste. That way, everyone gets their perfect bowl of snow cream!
With these simple adjustments, you can create a perfectly sweetened, creamy, and delicious snow treat. Now, grab a spoon and enjoy your customized snow cream! 🍦❄️
Chill Your Ingredients for a Better Texture
One of the secrets to making smooth, creamy, and fluffy snow cream is ensuring that all your ingredients are properly chilled before mixing. Since snow melts quickly, using cold ingredients helps maintain the right consistency and prevents your snow cream from turning into a watery mess.
1. Why Chilled Ingredients Matter
Using cold milk, cream, and mix-ins can make a big difference in your final snow cream texture. Here’s why:
Prevents Snow from Melting Too Quickly – Room-temperature liquids will melt snow instantly, creating a slushy texture instead of a creamy one.
Helps Ingredients Blend Evenly – Cold milk and flavorings mix more smoothly with the snow, preventing icy chunks.
Keeps Snow Cream Light and Fluffy – The colder your ingredients, the easier it is to maintain the airy structure of fresh snow.
2. How to Chill Your Ingredients Properly
To keep everything at the perfect temperature, follow these simple tips:
Refrigerate or Freeze Your Milk and Cream
- Place your milk or plant-based alternative in the refrigerator at least 1 hour before making snow cream.
- For an extra cold boost, you can chill it in the freezer for 15–20 minutes before using—but don’t let it freeze completely!
- If using sweetened condensed milk, keep it in the fridge overnight so it’s already cold when you need it.
Chill the Mixing Bowl
- Use a stainless steel or glass bowl and place it in the freezer for 10–15 minutes before making your snow cream.
- A cold bowl helps keep the snow from melting too fast as you mix.
Use Cold Flavorings and Toppings
- Vanilla extract, chocolate syrup, fruit purees, and other liquid ingredients should be kept in the fridge before adding them to the mix.
- If you’re adding chopped fruits or mix-ins like crushed cookies, store them in the fridge beforehand so they don’t introduce warmth into the mixture.
Pre-Chill Your Spoon or Spatula
- Using a cold spoon or spatula to mix your ingredients can help slow down melting.
- If serving multiple bowls, pre-chill your serving spoons in the freezer for a few minutes.
3. The Difference Between Icy and Creamy Snow Cream
The temperature of your ingredients can make or break the texture:
- Using chilled ingredients = smooth, creamy, and light snow cream.
- Using warm or room-temperature liquids = slushy, melted, and watery consistency.
4. Bonus Tip: Freeze Extra Snow for Later
If you’re making snow cream in batches, keep some fresh snow stored in an airtight container in the freezer. This way, if your first batch melts too quickly, you’ll have extra snow ready to go!
By taking the time to chill your ingredients, you’ll create a perfectly smooth, creamy, and delicious snow cream that holds its shape longer—so you can enjoy every bite! 🍦❄️
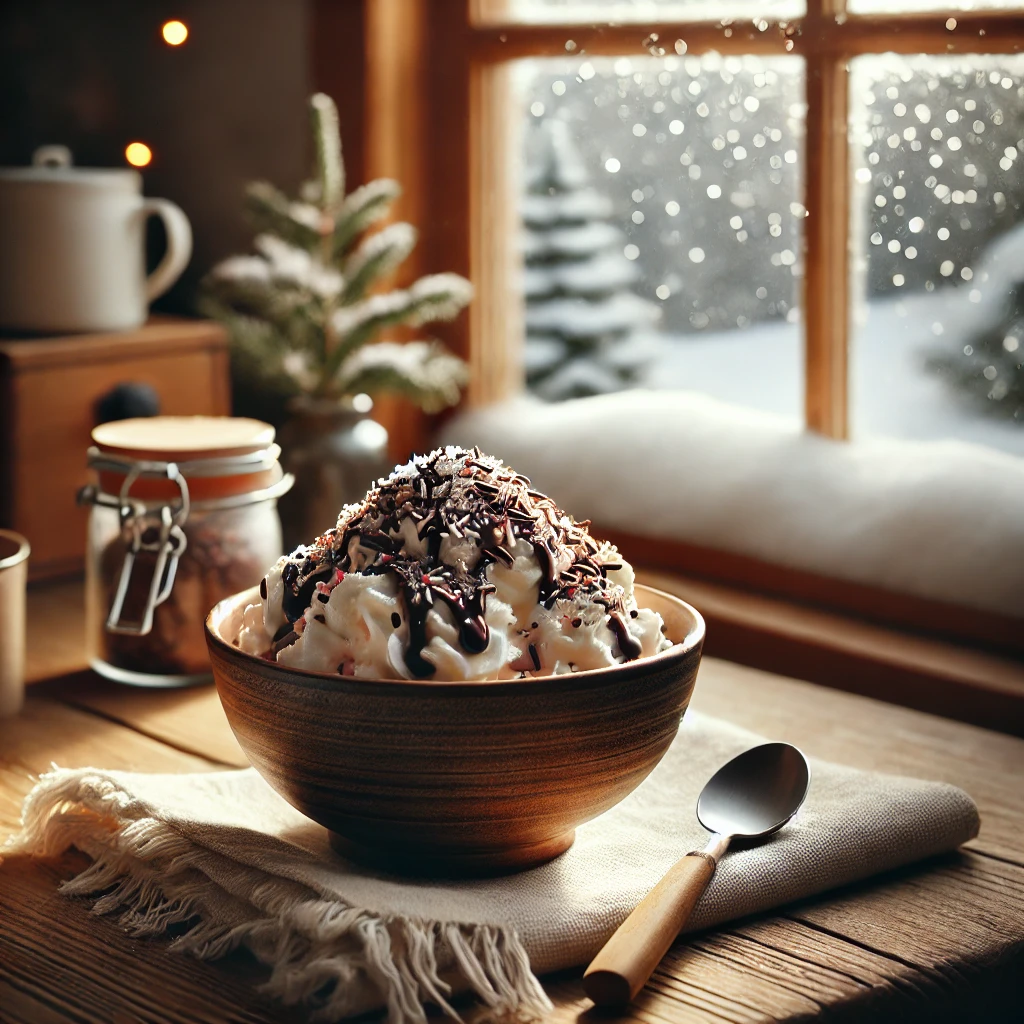
Add Fun Toppings for Extra Flavor
Once you’ve made your creamy, delicious snow cream, it’s time to take it to the next level with fun and flavorful toppings! Toppings not only enhance the taste but also add different textures, making every bite more exciting. Whether you love classic, crunchy, fruity, or indulgent toppings, there’s something for everyone.
1. Classic Toppings for a Traditional Treat
These toppings are perfect if you want to stick with simple but delicious add-ins:
Chocolate Syrup – A drizzle of warm or cold chocolate sauce makes everything better!
Honey or Maple Syrup – Adds a natural, rich sweetness.
Crushed Cookies – Try Oreos, graham crackers, or shortbread for extra crunch.
Sprinkles – Perfect for kids (or anyone who loves a colorful treat)!
Mini Chocolate Chips – A great way to add little bites of chocolate in every spoonful.
2. Fruity Toppings for a Fresh Twist
Want to add a refreshing, naturally sweet touch? Try these fruity toppings:
Fresh Berries – Sliced strawberries, raspberries, blueberries, or blackberries add a juicy burst of flavor.
Sliced Bananas – A great pairing with chocolate or peanut butter.
Diced Mango or Pineapple – Adds a tropical twist to your snow cream.
Cherries – Maraschino or fresh cherries make the perfect finishing touch!
Citrus Zest – A sprinkle of orange or lemon zest brightens up the flavors.
3. Crunchy Toppings for Extra Texture
If you love a little crunch in every bite, try adding these:
Chopped Nuts – Almonds, pecans, walnuts, or peanuts give a satisfying crunch.
Toasted Coconut Flakes – Adds a hint of tropical sweetness.
Granola – A slightly sweet, crispy topping that pairs well with fruit.
Crushed Pretzels – A salty-sweet combo for those who love contrast.
4. Indulgent Toppings for a Decadent Dessert
If you want to turn your snow cream into a gourmet dessert, try these rich toppings:
Hot Fudge or Caramel Drizzle – Warm it up slightly for an ooey-gooey treat!
Shaved Chocolate – Use dark, milk, or white chocolate for an elegant touch.
Caramelized Popcorn – Sweet, salty, and crunchy all in one!
Brownie Crumbles – Adds fudgy, chewy bites to your snow cream.
Peanut Butter or Nutella Drizzle – Because peanut butter and chocolate always win!
5. Creative Combos for Next-Level Snow Cream
Feeling adventurous? Try these fun flavor combos:
S’mores Snow Cream – Crushed graham crackers + mini marshmallows + chocolate drizzle.
PB&J Snow Cream – Swirl in peanut butter and top with fresh berries.
Chocolate-Orange Delight – Chocolate chips + orange zest for a citrusy chocolate experience.
Cookies & Cream Dream – Crushed Oreos + whipped cream.
Berry Cheesecake – Crushed graham crackers + strawberries + a dollop of cream cheese.
Final Tip: Let Everyone Customize Their Own!
For the ultimate snow cream experience, set up a DIY toppings bar so everyone can mix and match their favorite flavors. That way, each person can create their perfect bowl of snow cream!
With all these delicious and creative topping ideas, your snow cream will never be boring. Now, grab a spoon and start experimenting with flavors! 🍦❄️
Conclusion: Enjoy Your Homemade Snow Cream!

Making homemade snow cream is a fun, simple, and delicious way to celebrate a fresh snowfall. With just a few ingredients and a little creativity, you can transform freshly fallen snow into a creamy, sweet, and customizable winter treat. Whether you prefer classic vanilla, rich chocolate, or a unique fruity variation, the possibilities are endless!
Not only is snow cream quick and easy to make, but it’s also a wonderful activity to enjoy with family and friends. Kids will love gathering fresh snow and picking their favorite toppings, while adults can appreciate the nostalgic charm of this old-fashioned winter dessert. Plus, by adjusting the sweetness, chilling your ingredients, and experimenting with different flavors, you can create a snow cream recipe that’s perfect for you!
So the next time you see fresh, powdery snow falling outside, grab a bowl, gather your ingredients, and whip up a batch of homemade snow cream. It’s a delightful way to make the most of winter and enjoy a little sweet magic straight from the sky. ❄️🍦
Now that you know all the tips and tricks, it’s time to start mixing—happy snow cream making! 😊
2 thoughts on “How to Make the Creamiest Snow Cream at Home”