
If you’ve ever strolled through a Swiss bakery in the morning, you’ve likely been tempted by the golden, flaky Gipfeli—Switzerland’s answer to the French croissant. Light, buttery, and delicately crisp on the outside, this beloved pastry is a breakfast staple across the country.
Unlike the classic French croissant, Swiss Gipfeli has a slightly denser texture and can be made with or without yeast, depending on the recipe. Whether enjoyed plain, filled with chocolate or almond paste, or paired with a cup of coffee, Gipfeli offers a delightful way to start the day.
In this guide, we’ll take you through a step-by-step process to make authentic Swiss Gipfeli from scratch. From choosing the right ingredients to mastering the rolling and baking techniques, you’ll learn everything needed to create these delicious pastries at home. Let’s get started! 🚀🥐
The History of Swiss Gipfeli
Swiss Gipfeli has deep roots in European pastry-making traditions, influenced by Austrian, French, and local Swiss baking methods. While it shares similarities with the French croissant, its origins can be traced back even further.

Origin and Cultural Significance in Switzerland
The story of Gipfeli begins with the Austrian Kipferl, a crescent-shaped pastry that dates back to at least the 13th century. Early versions of the Kipferl were denser and less flaky than modern pastries, often made with enriched dough instead of laminated layers of butter.
A key moment in pastry history occurred in 1683 in Vienna, during the Ottoman Empire’s siege of the city. Legend has it that Viennese bakers, who worked before dawn, overheard Ottoman soldiers tunneling under the city and raised the alarm. After the Austrian victory, bakers reportedly created a crescent-shaped pastry—the Kipferl—to symbolize the defeat of the Ottoman forces, as the crescent moon was a key emblem in the Ottoman flag.
Over time, the Kipferl spread across Europe, reaching Switzerland, where local bakers modified the recipe to suit Swiss preferences. The name “Gipfeli” comes from the Swiss German word “Gipfel,” meaning “summit” or “peak”, referencing the pastry’s curved, mountain-like shape. Unlike the butter-heavy French croissant that emerged later, Swiss Gipfeli developed into a lighter, less greasy breakfast pastry.
By the 19th and 20th centuries, Gipfeli became a breakfast staple in Switzerland. Unlike croissants, often associated with high-end patisseries, Gipfeli were sold in everyday bakeries and supermarkets, making them accessible to everyone. Today, they remain an essential part of Swiss culture, commonly paired with coffee, jam, or honey.
Popular Variations of Swiss Gipfeli
Swiss Gipfeli comes in many different variations, from classic butter versions to whole-grain, sweet, and savory adaptations. These variations cater to different tastes and dietary preferences, making Gipfeli a versatile treat for any occasion.
1. Classic Butter Gipfeli
This is the traditional Swiss Gipfeli, made with butter and a lightly sweetened dough. It has a golden, crisp exterior and a soft yet slightly firm interior. If you want to try making an authentic version at home, follow this Swiss Gipfeli recipe from Helvetic Kitchen for step-by-step instructions.
✔️ Best enjoyed with: Butter, jam, honey, or a cup of traditional Swiss coffee for an authentic breakfast experience.
✔️ Texture & taste: Light, slightly chewy, and subtly sweet.
2. Whole-Grain Gipfeli
For a healthier twist, whole-wheat Gipfeli offers more fiber and a nuttier flavor. Using whole-grain flour can slightly change the texture, making it denser but still delicious. If you’re interested in exploring more whole-grain baking techniques, check out King Arthur Baking’s guide to whole-wheat pastries for tips and ingredient swaps.
✔️ Best enjoyed with: Almond butter, fruit preserves, or a drizzle of honey.
✔️ Texture & taste: Heartier, slightly nutty, and more filling than classic butter Gipfeli.
3. Savory Gipfeli
While many enjoy Gipfeli as a sweet treat, savory versions are just as popular in Switzerland. Common fillings include cheese, ham, spinach, or even smoked salmon. If you love experimenting with different flavors, Taste Atlas’ Swiss pastry guide showcases other savory pastries you might enjoy.
✔️ Best enjoyed with: Soft cheeses, cured meats, or a light salad for a perfect Swiss-inspired snack.
✔️ Texture & taste: Buttery, flaky, and packed with flavorful fillings.
By trying out different variations, you can discover your personal favorite Gipfeli style—whether it’s the rich butter classic, a nutritious whole-grain option, or a savory version packed with delicious fillings.
4. Savory Gipfeli (Cheese, Ham & Herb Variations)
Not a fan of sweet pastries? Try savory Gipfeli filled with cheese, ham, or herbs.
- Cheese Gipfeli: Uses Swiss cheese like Gruyère or Emmental, which melts into the dough for a rich, slightly salty flavor.
- Ham & Cheese Gipfeli: Combines smoky ham with creamy melted cheese, making it a satisfying breakfast or snack.
- Herb & Seed-Crusted Gipfeli: Features rosemary, thyme, or sesame seeds for an extra burst of flavor.
✔️ Best enjoyed with: Soup, salad, or as a standalone snack.
✔️ Perfect for: A quick lunch, picnic, or savory breakfast option.
Would you like me to go even deeper into any of these variations, or add a new section? 😊
Ingredients Needed for Authentic Swiss Gipfeli
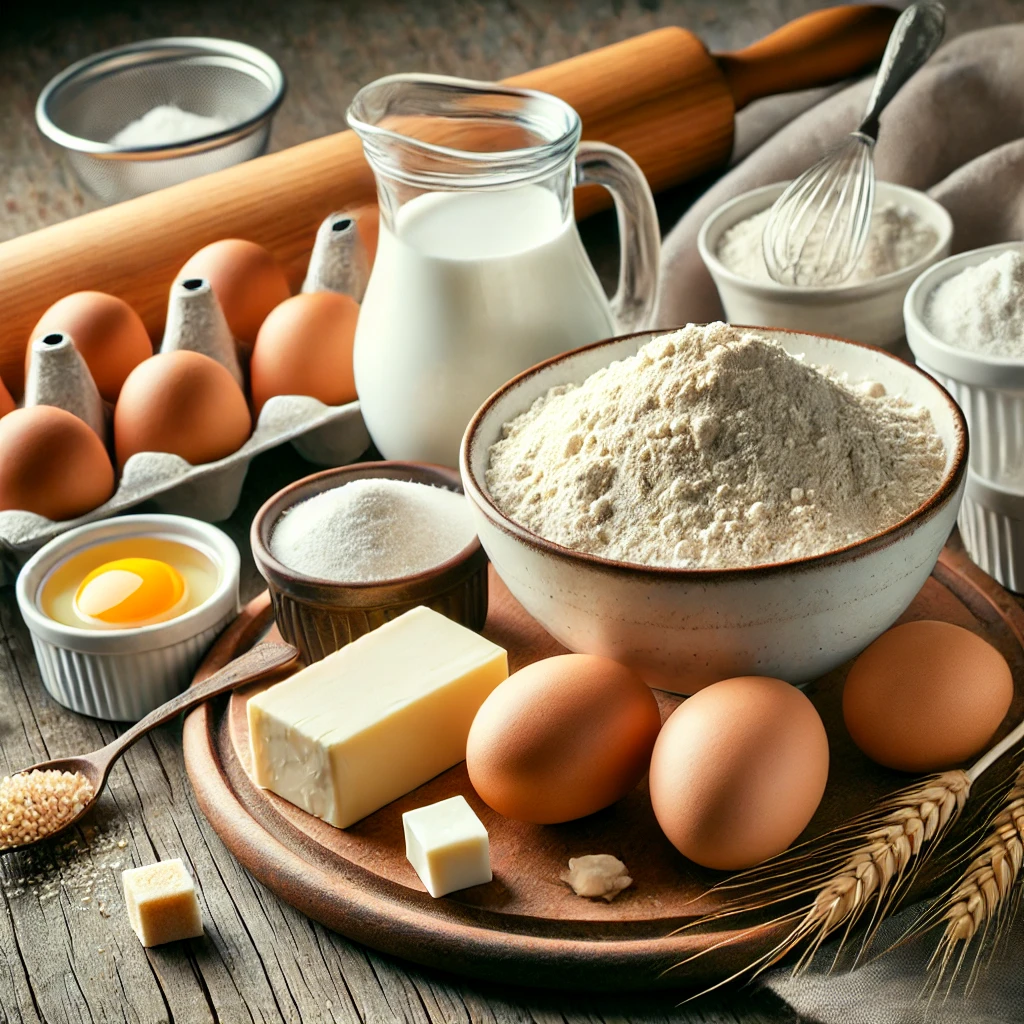
Essential Ingredients for the Perfect Gipfeli
The key to an authentic Swiss Gipfeli lies in the quality and balance of ingredients. Unlike French croissants, which rely heavily on butter for flakiness, Gipfeli incorporates a mix of traditional and modern ingredients to achieve its unique light yet slightly dense texture. Below, we’ll break down each ingredient, its role in the recipe, and possible variations.
1. Flour – The Foundation of the Dough
Flour is the structural base of any Gipfeli dough, influencing texture, elasticity, and rise. The right type of flour determines how soft or firm the final pastry will be.
Best Flour for Gipfeli:
All-Purpose Flour (Plain Flour) – The most common choice, giving a balanced structure with a soft bite.
Bread Flour (High-Protein Flour) – Adds extra chewiness due to higher gluten content, ideal for a firmer, more structured Gipfeli.
Pastry Flour – Creates a lighter, more delicate pastry, similar to a hybrid between Gipfeli and croissant.
👉 Pro Tip: Some Swiss bakers use a mix of all-purpose and bread flour to create a Gipfeli that is both tender and slightly chewy.
Flour Variations for Dietary Preferences:
- Whole Wheat Flour – For a healthier, fiber-rich Gipfeli with a slightly nuttier taste.
- Spelt Flour – An ancient grain alternative that adds a mildly sweet, earthy flavor while remaining digestible.
- Gluten-Free Flour Blends – For those with gluten sensitivities, using a mix of rice flour, tapioca starch, and xanthan gum can help replicate the traditional dough texture.
2. Butter – The Key to Flavor & Softness
Unlike croissants, Gipfeli contains less butter, but it’s still an essential ingredient that gives the pastry its moisture, tenderness, and subtle richness.
Best Butter for Gipfeli:
✔️ High-Quality European Butter (82% fat content or higher) – Creates a more tender, flavorful pastry. Swiss brands like Läderach Butter are often preferred.
✔️ Unsalted Butter – Provides better control over the dough’s salt balance.
✔️ Clarified Butter (Ghee) – Some bakers use this for a richer taste without excess moisture.
👉 Pro Tip: If you want a flakier Gipfeli, chill the butter before incorporating it into the dough. Cold butter slows gluten development, making the pastry lighter.
Butter Alternatives:
- Margarine – Common in commercial Swiss Gipfeli, but results in a slightly different texture.
- Coconut Oil – A dairy-free alternative that provides a mild sweetness.
- Olive Oil or Sunflower Oil – Less traditional but can be used for a vegan Gipfeli.
3. Milk – For Softness and a Golden Crust
Milk plays a key role in moisture, softness, and browning. Traditional Gipfeli recipes call for whole milk, which adds richness to the dough.
Milk Options:
Whole Milk – Provides the best texture, resulting in a soft, tender crumb.
Low-Fat Milk – Works, but results in a slightly drier pastry.
Evaporated Milk – Enhances richness if a more buttery taste is desired.
👉 Pro Tip: Brushing the Gipfeli with a milk wash before baking gives it a beautiful golden brown crust.
Milk Alternatives:
- Almond Milk – Adds a mild nutty flavor, great for dairy-free versions.
- Oat Milk – Creamy and neutral, making it a perfect non-dairy substitute.
- Soy Milk – Works well, but may alter the flavor slightly.
4. Yeast – The Rising Agent (Optional in Some Recipes)
Yeast is used in traditional Gipfeli to create a softer, airy texture. However, unlike croissants, not all Gipfeli recipes require yeast—some versions rely on baking powder instead.
Types of Yeast Used in Gipfeli:
Active Dry Yeast – Must be dissolved in warm liquid before adding to the dough.
Instant Yeast – Can be mixed directly into the flour for a quicker rise.
️ Fresh Yeast – Preferred by professional bakers for enhanced flavor and aroma.
👉 Pro Tip: If using yeast, allow the dough to rise for at least 1-2 hours before shaping. A slower fermentation process (overnight in the fridge) can enhance flavor.
Non-Yeast Variations:
For a denser, quicker-to-make Gipfeli, baking powder can replace yeast. This method skips the rising step, reducing preparation time.
5. Sugar – Balancing Sweetness
Swiss Gipfeli is slightly sweeter than croissants but still not as sugary as a Danish pastry. The sugar amount can be adjusted based on preference.
Best Sugar Choices for Gipfeli:
Granulated White Sugar – Provides a clean, mild sweetness.
Brown Sugar – Adds slight caramel notes.
Honey or Maple Syrup – Used in some artisan Gipfeli for a natural sweetness.
👉 Pro Tip: A small pinch of sugar helps the yeast activate faster, even in non-sweet versions.
6. Salt – Enhancing Flavor & Dough Strength
Salt is crucial for flavor balance and gluten development. Without salt, Gipfeli would taste flat and the dough would be weaker.
Best Salt Choices:
✔️ Fine Sea Salt – Dissolves evenly into the dough.
✔️ Kosher Salt – Adds a mild, clean taste.
👉 Pro Tip: Always add salt after mixing the yeast with flour to avoid interfering with fermentation.
7. Egg Wash – The Secret to a Glossy Finish
Brushing Gipfeli with egg wash before baking enhances color and shine. It creates the signature golden-brown crust.
Egg Wash Variations:
Whole Egg + Milk – Gives the deepest golden shine.
Egg Yolk + Cream – Creates a richer, darker color.
Milk-Only Wash – A lighter golden effect for a softer crust.
👉 Pro Tip: Brush gently and evenly to avoid streaks or over-browning in certain areas.
8. Optional Ingredients for Flavor Enhancements
Swiss Gipfeli can be customized with extra ingredients for unique flavors:
Vanilla Extract – Adds a delicate aroma.
Cinnamon or Cardamom – Gives a warm, spiced flavor.
Grated Lemon or Orange Zest – A citrusy freshness.
Sesame or Poppy Seeds – Commonly sprinkled on top for texture.
Conclusion
The perfect Gipfeli relies on high-quality ingredients that balance softness, light sweetness, and a hint of richness. Whether you prefer classic butter Gipfeli, whole wheat variations, or savory cheese-filled versions, understanding the role of each ingredient helps achieve the ideal texture and taste.
Would you like me to add a troubleshooting section (e.g., what to do if the dough is too dry, how to fix a dense Gipfeli, etc.)? 😊
The Role of Butter in Creating Flaky Layers
Butter is the key ingredient that gives pastries like Swiss Gipfeli and French Croissants their characteristic texture. The way butter is incorporated into the dough directly impacts flakiness, flavor, and overall mouthfeel. Let’s break down why butter matters and how it works its magic in baking.
1. Why Butter is Essential for Flakiness
Flaky layers in pastries are created through a process called lamination—a technique that involves folding and rolling butter into the dough to form multiple thin layers. When baked:
- The water content in butter turns into steam, which expands the layers and creates an airy texture.
- The fat in butter coats the flour, preventing excessive gluten development and keeping the pastry delicate rather than chewy.
- The milk solids in butter contribute to richness, browning, and depth of flavor.
Without butter, pastries would be denser and less flaky—which is why its quality and quantity matter.
2. Butter Content: Gipfeli vs. Croissant
The difference between Swiss Gipfeli and French Croissants largely comes down to butter-to-dough ratio:
🥐 French Croissant:
High butter content (up to 30-40% of the dough weight).
Requires multiple folds (usually three turns to create over 27 layers of dough and butter).
Results in ultra-light, airy, and crisp layers that separate when bitten into.
🥨 Swiss Gipfeli:
Uses less butter than croissants, making it less greasy.
Some variations (especially store-bought) replace butter with margarine, reducing cost and making it more compact.
Still has a slight flakiness, but the layers are less pronounced and the texture is more bread-like.
✅ Key Takeaway:
- More butter = more delicate, flaky layers → Croissants.
- Less butter = firmer, smoother bite → Gipfeli.
3. The Science of Butter Lamination
To achieve flakiness, butter must be cold and pliable when incorporated into the dough. Here’s why temperature is crucial:
🌡️ Cold Butter = Distinct Layers
- Keeps the fat from melting into the dough before baking.
- Ensures clear separation of layers as the pastry rises.
🔥 Warm Butter = Greasy & Dense Pastry
- Melts too early, making the layers stick together.
- Results in a heavy, dense texture instead of a light, flaky one.
That’s why laminated doughs like croissants and Gipfeli require chilling between folds—it prevents the butter from melting and helps maintain the layer structure.
4. Butter Alternatives: Can You Make Gipfeli Without Butter?
Some modern variations of Gipfeli use margarine instead of butter—especially in commercial bakeries. This affects:
🧈 Flavor – Butter has a rich, natural dairy taste, while margarine lacks depth.
🥐 Texture – Butter creates delicate, crisp layers, while margarine produces a more uniform, softer texture.
🔥 Melting Point – Margarine melts differently, making the pastry less flaky but sometimes more tender.
✅ Key Takeaway:
- For authentic flavor and best flakiness, always use real butter.
- If you prefer a lighter pastry, you can experiment with half-butter, half-margarine blends.
5. Tips for Using Butter in Homemade Gipfeli
If you’re making Gipfeli at home, here’s how to optimize butter usage for the best results:
Use high-fat European butter (at least 82% fat content) for a richer taste.
Keep the butter cold—chill it before incorporating it into the dough.
Don’t overwork the dough—too much handling softens the butter and ruins lamination.
Chill between folds to maintain clean layers.
Bake at high heat (around 200°C/400°F) to get the best puff and flakiness.
Final Thoughts: How Butter Defines a Great Gipfeli
Butter is the soul of laminated pastries, affecting everything from flakiness and flavor to structure and aroma. While Gipfeli uses less butter than croissants, it still relies on it for lightness and richness.
So, if you want a truly flaky, melt-in-your-mouth pastry, don’t skimp on high-quality butter—it’s the secret to an authentic, delicious Gipfeli! 🥐✨
Would you like me to add a step-by-step visual guide on butter folding techniques for homemade Gipfeli? 😊
Optional Fillings and Flavor Variations for Swiss Gipfeli
One of the best things about Swiss Gipfeli is its versatility. While the traditional version is delicious on its own, Gipfeli can also be filled or flavored in various ways to create unique taste experiences. From sweet and indulgent to savory and satisfying, here’s a deep dive into the different ways you can customize Gipfeli.
1. Sweet Fillings for a Decadent Treat
For those with a sweet tooth, adding a filling can take Gipfeli to the next level. Here are some of the most popular options:
🍫 Chocolate (Schoggigipfeli)
- A Swiss favorite, Schoggigipfeli features a rich chocolate filling—often made with dark or milk chocolate bars baked into the dough.
- The heat of the oven melts the chocolate, creating a gooey center.
- Some versions use chocolate spread (like Nutella) for a smoother, sweeter texture.
✅ Best for: Chocolate lovers who enjoy a warm, melty core in their pastry.
🍯 Almond Paste (Mandelgipfeli)
- Almond paste (or marzipan) is a classic filling that adds a nutty sweetness and slightly chewy texture.
- It’s often flavored with a hint of vanilla or almond extract for extra depth.
- Some bakers sprinkle sliced almonds on top for added crunch.
✅ Best for: Fans of rich, nutty flavors and slightly chewy pastries.
🍎 Fruit Preserves or Jam
- A layer of fruit jam (such as apricot, raspberry, or plum) gives a tangy sweetness that balances the buttery pastry.
- Some traditional Swiss bakeries use homemade apricot preserves, as the tartness complements the richness of the dough.
- Can be dusted with powdered sugar for an elegant finish.
✅ Best for: Those who love light, fruity desserts without being overly sweet.
🍮 Vanilla or Custard Cream
- A creamy vanilla or pastry cream filling gives Gipfeli a luxurious texture.
- The custard is often lightly sweetened and infused with vanilla bean or citrus zest for extra flavor.
- Works well with glazed or sugar-dusted Gipfeli for an extra indulgent touch.
✅ Best for: Anyone who loves rich, creamy fillings similar to Danish pastries.
2. Savory Fillings for a Hearty Option
Not a fan of sweet pastries? No problem! Swiss Gipfeli can be adapted into savory delights perfect for breakfast or a light snack.
🧀 Cheese-Filled Gipfeli
- A popular Swiss variant includes grated cheese (such as Gruyère, Emmental, or Appenzeller) folded into the dough.
- The cheese melts inside, creating a gooey, slightly crispy bite.
- Some versions add a dash of mustard or nutmeg to enhance the flavor.
✅ Best for: Cheese lovers who want a savory breakfast pastry.
🥓 Ham & Cheese (Schinken-Käse Gipfeli)
- A Swiss favorite that combines ham and melted cheese inside a flaky pastry.
- Sometimes includes a hint of Dijon mustard for a bit of sharpness.
- Great for on-the-go breakfasts or light lunches.
✅ Best for: Anyone who enjoys classic ham and cheese croissants.
🌿 Herbed Butter or Pesto
- Instead of sweet fillings, you can brush garlic butter, pesto, or herb-infused olive oil inside the dough.
- This adds a savory, aromatic depth without making the Gipfeli too heavy.
- Great as a side for soups or salads.
✅ Best for: Fans of Mediterranean flavors and herbaceous pastries.
3. Alternative Dough Flavors for Unique Twists
If you want to change the flavor of the dough itself, here are some creative variations:
🍂 Cinnamon Sugar Gipfeli
- The dough is lightly flavored with cinnamon and sugar before baking.
- Some versions brush melted butter on top and sprinkle extra cinnamon sugar for a crispy caramelized crust.
- Think of it as a Swiss take on a cinnamon roll, but lighter!
✅ Best for: Anyone who loves warm, spiced flavors in their pastries.
🍊 Lemon or Orange Zest
- Adding grated citrus zest to the dough gives a refreshing brightness.
- Works especially well with fruit-filled or chocolate-filled Gipfeli.
✅ Best for: Those who enjoy light, citrusy pastries with a hint of sweetness.
☕ Coffee or Cocoa-Infused Dough
- A touch of espresso powder or cocoa powder can be added to the dough for a subtle mocha flavor.
- This is especially popular in gourmet bakeries looking for a modern twist.
✅ Best for: Coffee and chocolate lovers who want a richer pastry experience.
4. Toppings & Finishes for Extra Flair
Even without fillings, you can elevate the flavor of Gipfeli with toppings and glazes.
✨ Classic Toppings
Powdered Sugar – A light dusting gives a delicate sweetness.
Sesame or Poppy Seeds – Adds a subtle nutty crunch.
Sliced Almonds – Works well with almond-filled versions.
🍯 Glazes for a Shiny Finish
Honey or Sugar Syrup – Brushed on after baking for a glossy, slightly sweet surface.
Egg Wash – Creates a golden brown crust with a beautiful sheen.
Chocolate Drizzle – Ideal for chocolate-filled or almond-flavored Gipfeli.
✅ Best for: Those who love a little extra crunch or sweetness in their pastries.
Final Thoughts: The Endless Possibilities of Gipfeli
Whether you keep it traditional or experiment with new flavors, Gipfeli is incredibly versatile. You can:
Stuff it with sweet or savory fillings for a customized experience.
Infuse the dough with subtle flavors like cinnamon, vanilla, or citrus.
Top it with seeds, sugar, or chocolate for added texture.
💡 Tip: If you’re baking at home, try making a variety of filled and unfilled Gipfeli in one batch—it’s a great way to explore different flavor combinations!
Would you like me to include detailed step-by-step recipes for some of these variations? 😊
Step-by-Step Guide to Making Gipfeli from Scratch
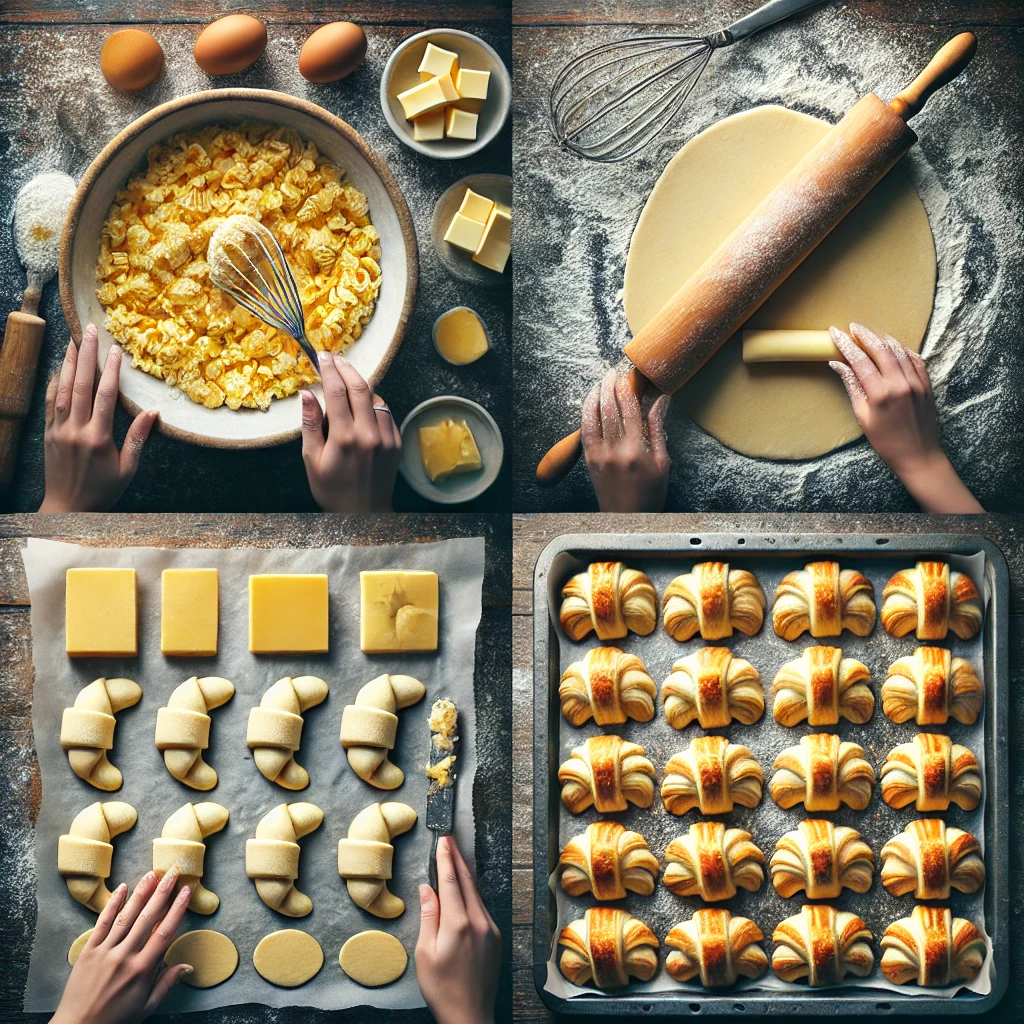
Preparing the Dough for Swiss Gipfeli
The dough is the foundation of a perfect Swiss Gipfeli. Whether you prefer a yeast-based version for a lighter, fluffier texture or a non-yeast version for a denser, more compact bite, mastering the dough is key to achieving the right consistency. Below, we’ll explore each step of the process, from choosing the right ingredients to proper kneading, resting, and rolling techniques.
1. Choosing the Right Ingredients
A well-made Gipfeli dough consists of a few simple ingredients, but each one plays a crucial role in determining the final texture and taste.
🌾 Flour – The Structural Base
- Most traditional recipes use all-purpose flour or a mix of bread flour for more structure.
- A higher protein content (like in bread flour) gives a chewier texture, while lower protein flours result in a more delicate, crumbly bite.
- Some versions use spelt flour for a nuttier taste.
🧈 Butter – For Flavor and Tenderness
- Butter adds richness and flakiness, though Gipfeli uses less butter than a French croissant.
- European-style butter (with higher fat content) is ideal for a smooth, supple dough.
🥚 Eggs – For Softness and Color
- Eggs contribute to a tender, richer dough.
- They also help achieve a golden-brown crust when brushed on before baking.
🥛 Milk – For a Softer Dough
- Many Swiss recipes include warm milk, which makes the dough softer and more pliable.
- Some variations use water instead of milk for a firmer bite.
🍚 Sugar – For Sweetness and Browning
- A small amount of sugar enhances the flavor and gives Gipfeli its slightly sweet taste.
- Sugar also helps in caramelization, giving the baked pastry a beautiful golden hue.
🧂 Salt – To Balance Flavors
- Salt is essential to prevent the dough from tasting flat.
- It also strengthens the gluten structure, improving the dough’s elasticity.
🍞 Yeast (Optional) – For a Lighter Texture
- Yeast-based Gipfeli dough is softer and airier.
- If using yeast, it requires proofing time to allow the dough to rise.
✅ Key Takeaway: Using yeast vs. no yeast will greatly affect the final texture. Yeast gives a lighter, fluffier pastry, while non-yeast Gipfeli has a denser, more bread-like consistency.
2. Mixing and Kneading the Dough
Method 1: Yeast-Based Dough (For a Lighter Gipfeli)
- Activate the Yeast
- In a bowl, mix warm milk (or water), sugar, and yeast.
- Let it sit for 5–10 minutes until it becomes foamy (this indicates the yeast is active).
- Combine Dry Ingredients
- In a separate bowl, mix flour and salt.
- Incorporate Butter and Eggs
- Cut softened butter into small cubes and rub it into the flour until it forms a crumbly texture.
- Add beaten eggs for extra richness.
- Mix and Knead
- Pour the activated yeast mixture into the dry ingredients.
- Knead the dough for 8–10 minutes until it becomes smooth and elastic.
- The dough should be soft but not sticky.
- First Proofing
- Place the dough in a lightly greased bowl, cover it, and let it rise for 1–2 hours until doubled in size.
Method 2: Non-Yeast Dough (For a Denser Gipfeli)
- Mix Dry Ingredients
- In a bowl, whisk together flour, salt, and sugar.
- Incorporate Butter and Liquid
- Cut cold butter into the flour mixture until it forms small crumbs.
- Gradually add milk or water and mix until a soft dough forms.
- Knead the Dough
- Knead for about 5 minutes, just until the dough is smooth.
- Be careful not to overwork it, as this can make the Gipfeli tough.
- Resting Time
- Let the dough rest in the fridge for 30 minutes before rolling it out.
✅ Key Takeaway: Yeast dough requires proofing time, while non-yeast dough is quicker to prepare but results in a firmer texture.
3. Rolling and Shaping the Dough
Once the dough is ready, it’s time to roll and shape the Gipfeli.
1: Rolling Out the Dough
- Lightly flour a surface and roll out the dough into a large rectangle (about 3–5 mm thick).
- Try to keep the edges straight for even cutting.
2: Cutting Triangles
- Using a sharp knife or pastry cutter, cut the dough into long, narrow triangles.
- The base of each triangle should be about 6–8 cm wide, and the length around 15 cm.
3: Adding Fillings (Optional)
- If using fillings (chocolate, jam, cheese, etc.), place a small teaspoon at the base of each triangle.
- Be careful not to overfill, or it may leak out during baking.
4: Rolling into a Crescent Shape
- Start at the wide base and gently roll the dough towards the tip.
- Curve the ends slightly to form the classic Gipfeli crescent shape.
✅ Pro Tip: For a flakier texture, refrigerate the shaped Gipfeli for 15–30 minutes before baking.
4. Final Proofing & Egg Wash
For Yeast-Based Dough
- Place the rolled Gipfeli on a lined baking sheet.
- Cover and let them rise for 30–45 minutes for a final proofing.
For Non-Yeast Dough
- No additional proofing is needed, so you can proceed directly to baking.
Brushing with Egg Wash
- Before baking, brush the tops with a light egg wash (1 egg yolk + 1 tbsp milk).
- This gives the Gipfeli a shiny, golden-brown crust.
5. Baking the Gipfeli
Oven Temperature & Timing
- Preheat the oven to 200°C (390°F).
- Bake for 15–20 minutes, or until golden brown.
- If baking a filled Gipfeli, reduce the temperature slightly to 190°C (375°F) to prevent over-browning.
✅ Pro Tip: Let the Gipfeli cool slightly before eating—this allows the layers to set and the flavors to develop.
Final Thoughts: Mastering the Dough for Perfect Gipfeli
Yeast-based Gipfeli are lighter and softer, requiring more time for proofing.
Non-yeast Gipfeli are denser and quicker to make.
Cold butter and proper rolling create flakier layers.
Egg wash gives a golden crust, while milk softens the dough.
Baking at the right temperature ensures even browning.
Would you like a step-by-step recipe with measurements for a traditional Swiss Gipfeli? 😊
Laminating the Dough for Flakiness
Laminating the dough is the most crucial step in creating the signature texture of Swiss Gipfeli. While Gipfeli is less flaky than a French croissant, the lamination process still plays a key role in achieving a light, layered structure. Proper lamination ensures the butter is evenly distributed between layers of dough, which results in a delicate crispness on the outside and a soft, airy inside.
This section will guide you through the science behind lamination, the step-by-step process, and common mistakes to avoid for the perfect Gipfeli.
1. What is Laminating Dough?
Laminating is the process of folding and rolling butter into the dough to create thin, alternating layers of fat and dough. When baked, the butter melts and releases steam, which puffs up the dough, forming those distinct layers.
🔬 The Science Behind Flaky Layers
- Butter acts as a barrier: When properly laminated, the butter forms thin sheets between the layers of dough, preventing them from fully merging.
- Steam creates lift: As the butter melts in the oven, it releases moisture, which turns into steam and pushes the layers apart, making the pastry rise.
- Gluten provides structure: The gluten network in the dough ensures that the layers hold their shape instead of collapsing.
✅ Key Takeaway: Proper lamination = Flaky, crisp, and light pastry!
2. Choosing the Right Butter for Lamination
Not all butter is created equal when it comes to laminating dough. The type of butter you use will affect how well the layers form and how crisp the final Gipfeli turns out.
🧈 European-Style Butter (Recommended)
- Contains 82%+ fat (higher than standard butter).
- Has less water content, which means better layering and less shrinkage during baking.
- Provides a rich, creamy flavor.
🧈 Regular Butter (Alternative)
- Lower fat content (~80%), which means more water.
- Can lead to more steam loss and uneven layers.
- Works for home baking but may not achieve the same crispiness.
Margarine?
- Some commercial Gipfeli use margarine instead of butter.
- Margarine is more stable at warm temperatures, making it easier to laminate.
- However, butter produces better flavor and a more delicate texture.
✅ Key Takeaway: Use cold, high-fat butter for best results!
3. Step-by-Step Guide to Laminating the Dough
Laminating dough takes time, but patience is key for achieving the right texture. Below is a step-by-step guide to ensure even layers.
🔹 1: Preparing the Butter Block (“Beurrage”)
- Take the butter out of the fridge and let it soften slightly (not melted!).
- Place it between two sheets of parchment paper and roll it into a thin rectangle (~5mm thick).
- Chill in the fridge for 15–20 minutes until firm but pliable.
✅ Pro Tip: The butter should be the same consistency as the dough for smooth lamination.
🔹 2: Rolling Out the Dough
- On a lightly floured surface, roll out the dough into a large rectangle (twice the size of the butter block).
- Place the chilled butter block in the center.
- Fold the dough over the butter like an envelope, sealing the edges gently.
✅ Pro Tip: Make sure the butter is fully enclosed to prevent it from leaking out later!
🔹 3: First Fold (Single or Book Fold)
- Roll the dough gently and evenly into a long rectangle (~3x the original size).
- Fold it into thirds (like a letter) or quarters (book fold).
- Wrap in plastic and chill for 30 minutes.
✅ Why Chill?
- Chilling firms up the butter, preventing it from melting into the dough.
- It allows gluten to relax, making the dough easier to roll out later.
🔹 4: Repeating the Folding Process
- Take the dough out and rotate it 90 degrees.
- Roll it out again into a long rectangle.
- Fold it in thirds (or quarters) again.
- Chill for another 30 minutes.
- Repeat this process at least 3–4 times for good layering.
✅ Key Takeaway: More folds = More layers = Flakier Gipfeli!
🔹 5: Final Resting Before Shaping
After the final fold, wrap the dough and chill for at least 1 hour before shaping into Gipfeli. This ensures the butter remains solid and the layers stay intact.
✅ Pro Tip: If your kitchen is warm, chill the dough between every fold to prevent the butter from melting.
4. Common Mistakes & How to Avoid Them
Laminating dough takes practice, and small mistakes can affect the final result. Here are some common pitfalls and how to fix them.
| Mistake | What Happens? | How to Fix It |
|---|---|---|
| Butter leaks during rolling | The layers won’t form properly, and the dough may become greasy. | Make sure the butter and dough are the same consistency before laminating. Keep the dough cold at all times. |
| Dough is too stiff to roll | This makes rolling difficult and leads to uneven layers. | Let the dough rest at room temperature for a few minutes before rolling. |
| Over-handling the dough | The butter melts into the dough, preventing flakiness. | Work quickly and chill between folds. Avoid excessive kneading. |
| Not enough folds | The final Gipfeli will be dense instead of layered. | Aim for 3–4 folds for proper lamination. |
| Skipping chilling steps | The dough becomes too soft, and layers merge. | Always chill between folds and before shaping. |
5. Final Thoughts: Mastering Dough Lamination for Gipfeli
Use cold, high-fat butter for best flakiness.
Chill between folds to keep layers intact.
Roll gently and evenly to prevent the butter from breaking through.
3–4 folds create enough layers for a delicate texture.
Patience is key! The more carefully you laminate, the better your Gipfeli will turn out.
Now that the dough is laminated, the next step is shaping the Gipfeli into their iconic crescent form! Would you like a visual step-by-step guide to shaping and rolling the final pastry? 😊
Shaping and Rolling the Gipfeli
Once the dough is laminated and properly rested, the next crucial step is shaping and rolling the Gipfeli. This process determines not only the final appearance of the pastry but also how it bakes and rises in the oven. Unlike croissants, which have sharper points and distinct, layered edges, Gipfeli are typically rounder, more compact, and slightly denser.
Mastering the cutting, rolling, and shaping technique ensures that each Gipfeli has the perfect structure, whether you’re making the classic version or experimenting with different fillings.
1. Preparing the Dough for Shaping
Before shaping the Gipfeli, you need to properly roll out the laminated dough. Here’s how:
🔹 Step 1: Lightly Flour Your Work Surface
- Sprinkle a light layer of flour onto your surface to prevent sticking.
- Too much flour can dry out the dough, so use sparingly.
🔹 Step 2: Roll Out the Dough to the Right Thickness
- Use a rolling pin to gently roll the dough into a large rectangle (about 3–5mm thick).
- Maintain even thickness throughout to ensure uniform baking.
✅ Pro Tip: If the dough resists rolling or starts shrinking back, let it rest for 5–10 minutes to relax the gluten.
2. Cutting the Dough into Triangles
The classic Gipfeli shape starts with triangle-shaped dough pieces.
🔹 Step 1: Measuring and Cutting
- Use a sharp knife or pizza cutter to divide the dough into long triangles.
- A typical triangle size is about 8 cm wide at the base and 15 cm long.
- If making mini Gipfeli, reduce the triangle size accordingly.
✅ Key Tip: Keeping the triangles uniform ensures even baking and a consistent shape.
3. Rolling the Gipfeli – The Right Technique
🔹 Step 1: Creating Tension for the Perfect Roll
- Lightly stretch the base of each triangle outward. This helps the dough grip itself while rolling.
- Starting at the wide end, gently roll the triangle toward the tip.
- Apply slight pressure as you roll, but do not squash the dough—this keeps the layers intact.
✅ Pro Tip: If you want a more pronounced curl, roll the dough loosely; for a compact look, roll it more tightly.
🔹 Step 2: Creating the Crescent Shape
- Once rolled, gently bend the ends toward each other to create the traditional crescent shape.
- If making straight Gipfeli, you can leave them as is.
✅ Croissant vs. Gipfeli Shaping:
- Croissants have pointed ends that curve more dramatically.
- Gipfeli are often rounder and smoother, making them easier to handle.
4. Adding Fillings Before Rolling (Optional Step)
If you’re making filled Gipfeli, you’ll need to add the filling before rolling.
🔹 Step 1: Choosing Your Filling
Popular options include:
- Sweet: Chocolate, almond paste, vanilla custard, fruit preserves
- Savory: Cheese, ham, spinach, herb butter
🔹 Step 2: Placing the Filling
- Spoon a small amount of filling (1-2 teaspoons) onto the wide end of each triangle.
- Avoid overfilling—too much can cause leakage during baking.
- Then, proceed with rolling as normal.
✅ Pro Tip: Seal the edges with a tiny bit of water or egg wash to prevent the filling from spilling out.
5. Final Proofing Before Baking
Once all Gipfeli are shaped, they need a final rise to develop their airy texture.
🔹 Step 1: Place on a Baking Sheet
- Arrange the shaped Gipfeli on a parchment-lined baking sheet.
- Leave enough space between them (about 5 cm) to allow for expansion.
🔹 Step 2: Let the Dough Proof
- Cover the tray with a light kitchen towel and let the Gipfeli proof at room temperature for 30–45 minutes.
- The dough should puff up slightly but not double in size.
✅ Why This Step Matters: Proofing relaxes the dough and enhances the final texture, making the Gipfeli lighter.
6. Final Egg Wash for a Golden Finish
Before baking, the Gipfeli are brushed with egg wash to create a glossy, golden-brown crust.
🔹 Step 1: Preparing the Egg Wash
- Whisk 1 egg yolk with 1 tablespoon of milk for a deep golden color.
- Alternatively, use just milk for a softer shine.
🔹 Step 2: Brushing the Gipfeli
- Use a pastry brush to lightly coat each Gipfeli with the egg wash.
- Avoid excessive brushing—it can drip and cause uneven coloring.
✅ Key Tip: For extra shine, apply two layers of egg wash (one before proofing, one before baking).
7. Ready for Baking!
Now that the Gipfeli are shaped, filled (if desired), and proofed, they are ready for the oven! The next step is baking them to golden perfection.
Would you like a detailed baking guide next, including temperature, timing, and troubleshooting tips? 😊
Baking Tips for Golden, Crispy Gipfeli
Now that your Gipfeli are shaped, proofed, and egg-washed, it’s time for the final and most crucial step—baking them to golden perfection. The right baking techniques ensure that your Gipfeli have a crispy exterior, soft interior, and even golden-brown color.
Here are the essential baking tips to achieve that perfect Gipfeli texture:
1. Choosing the Right Oven Temperature
The baking temperature directly affects the texture and color of the Gipfeli.
🔹 Ideal Baking Temperature
- Conventional oven: 200°C (390°F)
- Fan-assisted oven: 180°C (355°F)
A high initial temperature helps create a crispy crust while allowing the inside to bake fully without drying out.
✅ Why It Matters:
- If the temperature is too low, the Gipfeli won’t rise properly and may end up pale and dense.
- If the temperature is too high, they might brown too quickly while remaining undercooked inside.
2. Preheating the Oven – A Crucial Step
Never skip preheating! A fully heated oven ensures that the Gipfeli start baking immediately, leading to a proper rise and flaky layers.
🔹 How Long to Preheat?
- Preheat for at least 15-20 minutes before baking.
- If using a baking stone or steel, preheat for at least 30 minutes for better heat retention.
✅ Key Tip: Placing the Gipfeli into a hot oven helps create an immediate steam burst, improving their lift and texture.
3. Proper Baking Time – Don’t Underbake or Overbake!
🔹 Ideal Baking Duration
- Regular-sized Gipfeli: 15–18 minutes
- Mini Gipfeli: 12–14 minutes
🔹 Signs They’re Ready:
Golden brown color on the top and bottom
Feels light and crisp when tapped
The layers should be well-defined and flaky
✅ Key Tip: If the tops brown too quickly, loosely cover them with foil in the last few minutes of baking.
4. Creating the Perfect Crispy Texture
A crispy Gipfeli requires the right balance of moisture, heat, and baking time.
🔹 How to Achieve Crispiness:
Use steam during baking – Spraying the oven with water or placing a small dish of water inside helps create a crisp crust.
Avoid opening the oven door too early – This can cause heat loss and deflate the pastries.
Let them cool on a wire rack – This prevents moisture from making the bottoms soggy.
✅ Pro Tip: If your Gipfeli turn out too soft, place them back in the oven for 2–3 extra minutes to crisp up.
5. Egg Wash for a Beautiful Golden Shine
Applying egg wash before baking gives Gipfeli their signature shiny, golden surface.
🔹 Best Egg Wash Recipe
🥚 1 egg yolk
🥛 1 tablespoon milk (for a glossy finish) or water (for a matte finish)
Brush the egg wash on gently with a pastry brush. Avoid excess pooling—too much wash can cause uneven browning.
✅ Double Egg Wash Technique:
- Apply one coat before proofing for a deep golden color.
- Apply a second coat just before baking for extra shine.
6. Using the Right Baking Tray & Lining
Best Tray: Use a light-colored metal baking sheet for even heat distribution.
Lining: Parchment paper or a silicone baking mat prevents sticking.
Spacing: Leave at least 5 cm (2 inches) between each Gipfeli to allow them to expand without touching.
✅ Avoid dark trays, as they can overbrown the bottoms too quickly.
7. Cooling for the Perfect Texture
Once out of the oven, the Gipfeli need to cool properly to maintain their crispiness.
🔹 Proper Cooling Technique
- Transfer to a wire rack immediately to prevent sogginess.
- Let them cool for at least 10–15 minutes before eating—this helps the layers set.
✅ Key Tip: If serving later, lightly reheat in the oven at 160°C (320°F) for 5 minutes to refresh the texture.
8. Troubleshooting Common Baking Issues
🔸 Pale Gipfeli?
✔ Increase the oven temperature by 10–15°C and bake for a few extra minutes.
🔸 Undercooked inside?
✔ Reduce the oven temperature slightly and bake longer for even cooking.
🔸 Too dry or hard?
✔ Reduce baking time or check if the dough was overproofed.
🔸 Burnt bottoms?
✔ Use a lighter-colored baking sheet and place it on a higher oven rack.
Final Thoughts
Mastering the baking process is the key to achieving golden, crispy, and delicious Swiss Gipfeli. By preheating properly, using steam, applying the right egg wash, and cooling correctly, you’ll get bakery-quality results every time!
Expert Tips for Perfect Homemade Gipfeli

Common Mistakes to Avoid When Baking Gipfeli
Baking Swiss Gipfeli to golden, flaky perfection requires attention to detail. Even small missteps can lead to dense, undercooked, or overly dry pastries. To help you achieve light, crispy, and flavorful Gipfeli, here are the most common mistakes bakers make—and how to fix them!
1. Skipping or Rushing the Proofing Process
❌ Mistake: Not giving the dough enough time to rise properly.
- Underproofed dough leads to dense, heavy Gipfeli instead of airy layers.
- Overproofed dough can collapse, resulting in flat and deflated pastries.
✅ Solution:
Follow the recommended proofing time—usually 1–2 hours at room temperature or overnight in the fridge for better flavor.
The poke test: Gently press the dough with a finger—if it springs back slowly, it’s ready. If it springs back immediately, it needs more time.
2. Using the Wrong Butter or Margarine
❌ Mistake: Using butter with a low-fat content or margarine substitutes.
- Lower-quality butter has higher water content, which affects the flakiness and structure.
- Margarine lacks the rich buttery flavor and can make Gipfeli too greasy.
✅ Solution:
Use European-style butter (82%+ fat content) for better layers.
If substituting with margarine, expect a different texture—less flakiness and a softer bite.
3. Overworking or Underworking the Dough
❌ Mistake: Kneading too much or too little.
- Overworked dough develops too much gluten, making Gipfeli tough.
- Underworked dough lacks elasticity and won’t rise properly.
✅ Solution:
Knead just until smooth and elastic—about 5–7 minutes by hand or 3–4 minutes with a stand mixer.
Let the dough rest between steps to relax the gluten and prevent a chewy texture.
4. Rolling the Dough Too Thin or Too Thick
❌ Mistake:
- Too thin: The layers won’t separate well, making the Gipfeli too flat and crispy.
- Too thick: The inside stays doughy and undercooked.
✅ Solution:
Roll the dough to about 3–4 mm (1/8 inch) thick for the perfect balance of layers and rise.
Use even pressure when rolling to maintain consistency.
5. Incorrect Laminating (Butter-Layering) Technique
❌ Mistake:
- Butter melting during lamination—this prevents layers from forming.
- Uneven layers—leads to irregular puffing when baking.
✅ Solution:
Keep the butter and dough chilled at all times—refrigerate between each folding step.
Don’t roll too aggressively—use gentle, even strokes to keep the butter layers intact.
6. Not Preheating the Oven Properly
❌ Mistake: Placing Gipfeli in a cold or improperly preheated oven.
- A cold oven won’t create the initial steam burst needed for flaky layers.
- Uneven heat distribution can lead to patchy browning.
✅ Solution:
Always preheat your oven for at least 15–20 minutes before baking.
Use an oven thermometer to ensure the correct temperature—home ovens can be inaccurate!
7. Using the Wrong Baking Temperature
❌ Mistake:
- Too low: Gipfeli won’t brown properly and may turn out pale and doughy.
- Too high: The outside burns before the inside is fully baked.
✅ Solution:
Bake at 200°C (390°F) for a conventional oven or 180°C (355°F) for a fan-assisted oven.
If your Gipfeli are browning too fast, reduce the heat by 10–15°C in the final minutes.
8. Applying Too Much or Too Little Egg Wash
❌ Mistake:
- Too much egg wash: The excess drips down and bakes unevenly, making the edges hard or soggy.
- Too little egg wash: The Gipfeli won’t achieve a glossy golden-brown finish.
✅ Solution:
Use a light, even coat of egg wash—don’t drench the dough.
For extra shine, apply a second coat just before baking.
9. Placing Gipfeli Too Close Together on the Baking Tray
❌ Mistake: Overcrowding the tray.
- This prevents proper air circulation, leading to uneven baking and misshapen pastries.
✅ Solution:
Leave at least 5 cm (2 inches) of space between each Gipfeli.
If baking large batches, use multiple trays and rotate them halfway through.
10. Not Cooling Properly After Baking
❌ Mistake:
- Leaving Gipfeli on a hot tray causes them to steam and get soggy.
- Storing them immediately traps moisture, ruining the crisp texture.
✅ Solution:
Transfer Gipfeli to a wire rack immediately after baking.
Let them cool for at least 10–15 minutes before eating or storing.
11. Storing Gipfeli Incorrectly
❌ Mistake:
- Storing them in an airtight container traps moisture, making them soft.
- Keeping them uncovered dries them out too quickly.
✅ Solution:
Short-term storage (1–2 days): Keep in a paper bag at room temperature.
Long-term storage (up to 1 month): Freeze them and reheat in the oven at 160°C (320°F) for 5 minutes.
Final Thoughts
Avoiding these common mistakes will help you bake flawless, golden, and crispy Swiss Gipfeli every time. Whether it’s proper proofing, using quality butter, rolling the right thickness, or baking at the perfect temperature, small details make all the difference!
Would you like a section on how to fix baking disasters (e.g., too dense, too pale, or too dry Gipfeli)? 😊
How to Store and Reheat Gipfeli
Swiss Gipfeli are best enjoyed fresh out of the oven, but if you have leftovers, knowing the proper storage and reheating techniques will help preserve their flaky, buttery goodness. The wrong storage method can lead to dry, stale, or soggy pastries, while improper reheating may cause them to lose their crispiness.
Here’s how to keep your Gipfeli fresh and bring them back to life when you’re ready to enjoy them again.
1. Storing Gipfeli for Short-Term Freshness (1–2 Days)
❌ Common Mistake:
- Storing Gipfeli in plastic bags or airtight containers traps moisture, making them soft and chewy instead of crispy.
- Leaving them fully exposed to air causes them to dry out quickly.
✅ Best Storage Method:
Place Gipfeli in a paper bag or wrap them loosely in parchment paper to allow slight airflow while preventing them from drying out.
Store them at room temperature in a cool, dry place—avoid direct sunlight or humid spots (like near the stove).
If you want to extend freshness for another day, cover them lightly with a clean kitchen towel to maintain their crispiness.
2. Storing Gipfeli for Longer (3–5 Days in the Fridge)
❌ Common Mistake:
- Refrigerating Gipfeli directly can dry them out and make them stale faster.
✅ Best Storage Method:
Wrap each Gipfeli in wax paper or aluminum foil, then place them in an airtight container before refrigerating.
This method slows down the staling process and protects them from absorbing odors from the fridge.
Reheat before eating (see reheating section below), as refrigeration hardens the butter inside, making them seem dry.
3. Freezing Gipfeli for Long-Term Storage (Up to 1 Month)
❌ Common Mistake:
- Freezing Gipfeli without protection causes freezer burn, which dries them out and affects the texture.
✅ Best Storage Method:
Let freshly baked Gipfeli cool completely before freezing to avoid condensation.
Wrap each one tightly in plastic wrap, then place them in a freezer-safe bag or container.
Label with the date—they’ll stay fresh for up to one month.
📌 Pro Tip: If you love fresh-baked pastries, freeze unbaked Gipfeli instead! Shape them, freeze them on a tray, then transfer to a freezer bag. When ready, bake directly from frozen—just add 5 extra minutes to the baking time.
4. How to Reheat Gipfeli Without Losing Crispiness
A. Reheating Gipfeli in the Oven (Best Method)
✅ Best for: Keeping them crispy and fresh-tasting.
- Preheat the oven to 160°C (320°F).
- Place Gipfeli on a baking tray without covering—this prevents them from steaming.
- Bake for 5–7 minutes (or 10 minutes if frozen) until warm and crispy.
- Let cool for 1 minute before eating for the perfect texture.
📌 Pro Tip: If your Gipfeli seem dry, lightly mist them with water before reheating to restore some moisture.
B. Reheating Gipfeli in an Air Fryer (Fast & Effective Alternative)
✅ Best for: A quick, crispy result without using the oven.
- Set your air fryer to 160°C (320°F).
- Place the Gipfeli inside without overcrowding.
- Heat for 3–5 minutes, checking for crispiness.
📌 Pro Tip: If using an air fryer, don’t reheat too long—it can make the Gipfeli too dry and crunchy.
C. Reheating Gipfeli in a Toaster Oven (Great for Small Batches)
✅ Best for: A balance of quick reheating and good texture.
- Preheat the toaster oven to 160°C (320°F).
- Place the Gipfeli inside and warm for 4–5 minutes.
- Let it cool for 1 minute before eating.
D. Reheating Gipfeli in a Microwave (Not Recommended, But Possible)
🚫 Worst method for maintaining flakiness.
- The microwave will heat the inside too quickly, making the butter melt and turning the layers chewy instead of crispy.
- However, if you’re in a rush, wrap the Gipfeli in a slightly damp paper towel and microwave for 10–15 seconds on low power.
📌 Pro Tip: If you must use a microwave, follow it up with 30 seconds in a toaster oven or air fryer to crisp up the outside.
Final Thoughts
The best way to enjoy Gipfeli is fresh, but with the right storage and reheating methods, you can still enjoy them days (or even weeks) later.
Storage Recap:
- 1–2 days: Paper bag at room temperature.
- 3–5 days: Wrapped and stored in an airtight container in the fridge.
- Up to 1 month: Freeze wrapped Gipfeli in an airtight bag.
Reheating Recap:
- Oven (Best Method): 160°C (320°F) for 5–7 minutes.
- Air Fryer: 160°C (320°F) for 3–5 minutes.
- Toaster Oven: 160°C (320°F) for 4–5 minutes.
- Microwave (Not Ideal): 10–15 seconds, then crisp up in an oven.
Would you like me to add troubleshooting tips for reheating (e.g., how to fix dry or overly soft Gipfeli)? 😊
Best Ways to Serve Swiss Gipfeli
Swiss Gipfeli are a beloved staple in Swiss bakeries and homes, enjoyed in both sweet and savory variations. Whether you prefer them plain, filled, or paired with spreads and beverages, there are countless ways to elevate your Gipfeli experience. Here’s how to serve them at their best.
1. Enjoying Gipfeli Plain – The Traditional Way
Gipfeli are often served as they are, with no additional toppings. Their slightly sweet, buttery flavor makes them delicious on their own, especially when freshly baked. This is how many Swiss people enjoy them, particularly for breakfast or a quick snack.
📌 Best for: A simple, fuss-free treat that highlights the Gipfeli’s texture and taste.
🔹 Pairing Tip: Enjoy with a cup of coffee, tea, or hot chocolate for a true Swiss breakfast experience.
2. Classic Sweet Pairings
If you have a sweet tooth, there are many ways to enhance the natural flavors of Gipfeli with classic Swiss spreads and toppings.
A. Butter & Jam – A Breakfast Staple
Slice a warm Gipfeli in half and spread butter for an extra creamy taste.
Add a layer of Swiss jam or preserves (apricot, raspberry, strawberry, or cherry are popular).
📌 Pro Tip: Use high-quality, locally sourced Swiss butter for an authentic flavor boost.
B. Honey & Nut Butters – A Naturally Sweet Option
Drizzle Swiss alpine honey over a warm Gipfeli for a natural sweetness.
Spread almond butter, hazelnut spread, or peanut butter for a nutty twist.
📌 Pro Tip: Pair honey with a sprinkle of cinnamon for an extra aromatic experience.
C. Swiss Chocolate Spread or Nutella – A Decadent Treat
Spread a layer of Swiss chocolate spread or Nutella on a warm Gipfeli.
Sprinkle with chopped hazelnuts for added crunch.
📌 Perfect for: A luxurious weekend breakfast or a sweet afternoon snack.
D. Pastry Cream, Custard, or Whipped Cream – A Café-Style Touch
Fill Gipfeli with vanilla pastry cream or a light custard for a more indulgent serving.
Serve with a dollop of fresh whipped cream for a delicate dessert feel.
📌 Pro Tip: Lightly dust with powdered sugar for a bakery-style finish.
3. Savory Serving Ideas
Swiss Gipfeli aren’t just for sweet pairings—they make a fantastic savory breakfast or light meal too!
A. Cheese & Ham – A Swiss Café Classic
Slice a Gipfeli in half and fill with Swiss cheese (Emmental, Gruyère, or Appenzeller).
Add ham, turkey, or smoked salmon for a hearty option.
For extra flavor, spread a thin layer of butter or Dijon mustard.
📌 Best enjoyed with: A warm cup of café crème or espresso.
B. Scrambled Eggs & Avocado – A Modern Twist
Slice a Gipfeli and add fluffy scrambled eggs.
Top with sliced avocado, arugula, or smoked salmon.
Sprinkle with a touch of black pepper or chili flakes for extra flavor.
📌 Best for: A protein-packed breakfast or brunch option.
C. Fresh Herbs & Soft Cheese – A Light & Elegant Option
Spread a Gipfeli with cream cheese, ricotta, or fresh goat cheese.
Top with chopped chives, basil, or parsley.
Drizzle with a little olive oil or balsamic glaze for added depth.
📌 Perfect for: A light afternoon snack with herbal tea or white wine.
4. Serving Gipfeli for Special Occasions
A. Swiss Breakfast Platter (Z’Morge Tradition)
Gipfeli are often part of a larger Swiss breakfast spread, which includes:
Fresh bread, Zopf (braided bread), and rolls
Butter and homemade jam
Cheese and cold cuts
Muesli, yogurt, and fresh fruit
📌 Perfect for: A relaxed weekend breakfast with family and friends.
B. High Tea or Coffee Break – Swiss Style
Arrange mini Gipfeli on a platter alongside small pastries, cookies, and macarons.
Serve with freshly brewed Swiss coffee, hot chocolate, or an herbal tea selection.
📌 Perfect for: An elegant afternoon gathering or a cozy café-style experience at home.
C. Dessert-Inspired Gipfeli Creations
If you want to transform Gipfeli into a full dessert, try:
Ice Cream Sandwich: Slice a Gipfeli in half and fill it with vanilla or hazelnut ice cream.
Chocolate-Dipped Gipfeli: Dip one end in melted Swiss chocolate and let it set.
Gipfeli Bread Pudding: Use day-old Gipfeli to make a rich bread pudding by soaking pieces in a mix of milk, eggs, sugar, and cinnamon before baking.
📌 Best for: A creative take on classic Swiss pastries for a dinner party or special treat.
5. The Best Beverages to Pair with Gipfeli
A great Gipfeli experience isn’t complete without the perfect drink.
A. Coffee & Espresso-Based Drinks ☕
Café crème (Swiss-style coffee with a bit of milk) – the ultimate classic.
Espresso or cappuccino – a rich and bold contrast to the buttery pastry.
Latte macchiato – smooth and creamy, perfect for a morning treat.
📌 Best for: A traditional Swiss breakfast experience.
B. Hot Chocolate & Swiss Milk-Based Drinks 🍫
Swiss hot chocolate – thick, rich, and perfect for dipping Gipfeli.
Ovaltine (Ovomaltine) – a malted chocolate drink loved in Switzerland.
📌 Best for: A cozy winter morning or a nostalgic childhood favorite.
C. Tea Selections 🍵
Herbal teas (chamomile, peppermint, or Alpine herbs) – great for a light, refreshing balance.
Black tea with a splash of milk – a subtle contrast to the sweetness of the pastry.
📌 Best for: An afternoon tea break or a caffeine-free option.
Final Thoughts
Whether you enjoy Gipfeli plain, sweet, or savory, there are countless ways to serve them based on your preferences and the occasion.
Quick Recap:
Plain & traditional – Best for a quick, simple treat.
Sweet toppings (jam, honey, chocolate, whipped cream) – Ideal for breakfast or dessert.
Savory fillings (cheese, ham, eggs, avocado) – Perfect for a hearty meal.
Special occasions (Swiss breakfast, high tea, dessert ideas) – Elevate your Gipfeli experience.
Beverage pairings (coffee, hot chocolate, tea) – Complement the flavors beautifully.
Would you like a step-by-step guide for making some of these pairings at home? 😊
Final Thoughts & FAQs

Can I Make Gipfeli Without Yeast?
Yes! While traditional yeast-based Gipfeli are common, you can absolutely make Gipfeli without yeast. In fact, yeast-free Gipfeli are quicker, easier, and still delicious. Whether you want a faster bake time, a firmer texture, or a diet-friendly alternative, this section explores everything you need to know about making yeast-free Gipfeli.
1. Yeast-Free Gipfeli: What to Expect
When you skip yeast in a Gipfeli recipe, the dough behaves differently compared to traditional yeast-leavened versions. Here’s what to expect:
Firmer texture – Yeast helps create an airy, soft crumb. Without it, Gipfeli will have a more compact, bread-like texture.
Less rise – Without yeast fermentation, the dough won’t expand as much, resulting in denser pastries.
Shorter preparation time – Yeast-based Gipfeli require proofing (resting for hours). Without yeast, you can go from mixing to baking in under an hour.
Different flakiness – The layering technique still adds some crispiness, but it won’t be as light and airy as a traditional croissant.
📌 Best for: Those who want a quick Gipfeli recipe without long resting times or those who prefer a denser, more compact pastry.
2. What Can You Use Instead of Yeast?
If you’re avoiding yeast, you’ll need an alternative leavening agent to give your Gipfeli some lift. Here are the best options:
A. Baking Powder – The Most Common Substitute
Works by creating air pockets in the dough when mixed with liquid and heat.
Provides a slight rise but doesn’t create airy layers like yeast.
Best used in buttery, laminated Gipfeli dough to maintain some flakiness.
📌 Best for: Quick, flaky Gipfeli with a lighter texture than regular bread.
B. Baking Soda + Acid (Buttermilk, Yogurt, Lemon Juice)
Baking soda needs an acidic ingredient to activate (buttermilk, yogurt, vinegar, or lemon juice work well).
Helps add a mild rise and a soft, slightly tangy flavor.
Works best in softer, non-laminated dough (e.g., a simple rolled pastry dough).
📌 Best for: A quick, slightly softer Gipfeli without the traditional layering.
C. Puff Pastry Dough (Pre-Made or Homemade)
Uses butter layers and steam for flakiness instead of yeast.
Produces a crispy, flaky texture, similar to French pâte feuilletée.
Requires proper laminating and chilling for best results.
📌 Best for: A flaky, layered Gipfeli alternative without the need for yeast fermentation.
3. Recipe for Quick Yeast-Free Gipfeli
If you’re short on time, this baking powder-based Gipfeli recipe gives you flaky, buttery pastries in just over an hour.
Ingredients
- 250g (2 cups) all-purpose flour
- 1 tsp baking powder
- ½ tsp salt
- 120g (½ cup) cold butter, cubed
- 120ml (½ cup) milk or buttermilk
- 1 egg (for egg wash)
Instructions
1️⃣ Mix Dry Ingredients: In a bowl, whisk together flour, baking powder, and salt.
2️⃣ Incorporate Butter: Add cold butter cubes and rub into the flour using your fingers or a pastry cutter until the mixture resembles coarse crumbs.
3️⃣ Add Liquid: Pour in the milk (or buttermilk) and gently mix until a dough forms. Do not overmix.
4️⃣ Roll & Fold:
- Roll the dough into a rectangle on a floured surface.
- Fold it in thirds (like a letter), then roll it out again.
- Repeat 2-3 times to create basic flaky layers.
5️⃣ Shape the Gipfeli:
- Roll the dough into a large circle (about 3-4mm thick).
- Cut into triangles and gently roll from the wide base to the tip.
- Slightly curve the ends to form the classic Gipfeli shape.
6️⃣ Egg Wash & Bake:
- Brush each Gipfeli with a beaten egg for a golden finish.
- Bake at 180°C (350°F) for 20-25 minutes, until golden brown.
📌 Result: A quick, flaky, slightly denser Gipfeli with buttery layers and a mild crispiness.
4. Pros & Cons of Yeast-Free Gipfeli
| Feature | Yeast-Based Gipfeli | Yeast-Free Gipfeli |
|---|---|---|
| Texture | Light, airy, soft | Denser, more compact |
| Flakiness | More delicate layers | Crisp, but not as flaky |
| Preparation Time | 4-12 hours (proofing required) | ~1 hour (no proofing) |
| Complexity | More technique-heavy | Easier for beginners |
| Best for… | Traditional Swiss-style Gipfeli | Quick baking, firmer texture |
📌 Choose yeast-free Gipfeli if you want:
A faster, easier alternative with a buttery texture.
A denser, more compact pastry for a satisfying bite.
A simple, beginner-friendly recipe with minimal ingredients.
📌 Stick to yeast-based Gipfeli if you prefer:
A softer, airy texture with delicate layers.
The traditional Swiss bakery-style experience.
The authentic laminated dough process.
5. Can I Make a Vegan Yeast-Free Gipfeli?
Yes! You can make a vegan version of yeast-free Gipfeli by swapping out the butter, milk, and egg wash:
Butter Substitute: Use vegan butter or coconut oil (for a slightly different flavor).
Milk Substitute: Almond, oat, or soy milk work well.
Egg Wash Alternative: Brush with plant-based milk or maple syrup for a golden finish.
📌 Pro Tip: Vegan butter with a high fat content works best to replicate traditional Gipfeli texture.
Final Thoughts
Yeast-free Gipfeli are a fantastic alternative for those looking for a quicker, simpler pastry without long proofing times. While they won’t have the exact same airy, flaky structure as yeast-based versions, they still offer a delicious, buttery, and slightly crispy experience.
Quick Recap:
Yes, you can make Gipfeli without yeast!
Baking powder or puff pastry dough can help create flakiness.
Yeast-free versions are quicker but slightly denser.
Perfect for beginners who want a simple, homemade pastry.
How to Make Whole Wheat or Vegan Gipfeli
Swiss Gipfeli can be adapted for different dietary needs, including whole wheat and vegan variations. Whether you want a healthier version with whole grains or a dairy-free, egg-free alternative, this section will walk you through everything you need to know.
1. Whole Wheat Gipfeli: A Healthier Alternative
Whole wheat flour brings more fiber, nutrients, and a richer flavor to Gipfeli, but it also affects the texture and rise of the pastry. To achieve the perfect balance, it’s important to adjust the ingredients and hydration levels.
A. What to Expect with Whole Wheat Dough
Denser texture – Whole wheat flour absorbs more liquid and has less gluten than white flour, resulting in a heavier dough.
Less flakiness – The high bran content in whole wheat flour disrupts the delicate layering process.
Nutty, slightly earthy taste – Whole wheat Gipfeli have a deeper, slightly sweet, nutty flavor.
Healthier alternative – Higher in fiber, B vitamins, and antioxidants.
B. How to Adjust the Recipe for Whole Wheat Gipfeli
To keep the Gipfeli flaky and soft, follow these modifications:
1️⃣ Use a Blend of Whole Wheat & White Flour
- Instead of 100% whole wheat, use 50% whole wheat and 50% white flour (or bread flour).
- This keeps the texture lighter while still adding fiber and nutrients.
2️⃣ Increase Hydration
- Whole wheat flour absorbs more liquid than white flour.
- Add 10-15% more milk or water to the dough to prevent dryness.
3️⃣ Incorporate Vital Wheat Gluten (Optional)
- To improve elasticity and structure, add 1 tablespoon of vital wheat gluten per cup of whole wheat flour.
- This helps mimic the gluten strength of white flour, making the dough less dense.
4️⃣ Give the Dough Extra Rest Time
- Whole wheat needs a longer resting time to allow the flour to absorb moisture properly.
- Let the dough rest for 30-45 minutes before rolling and shaping.
C. Whole Wheat Gipfeli Recipe
Ingredients
- 150g (1 ¼ cups) whole wheat flour
- 150g (1 ¼ cups) all-purpose flour
- 1 tsp salt
- 2 tbsp sugar (or honey for extra moisture)
- 1 ½ tsp baking powder (for non-yeast version)
- 120g (½ cup) cold butter, cubed (or vegan butter for dairy-free)
- 150ml (⅔ cup) milk (or plant-based milk)
Instructions
1️⃣ Mix the dry ingredients – Combine flours, salt, sugar, and baking powder.
2️⃣ Rub in butter – Mix in cold butter until the texture resembles breadcrumbs.
3️⃣ Add liquid – Pour in milk and gently mix until a dough forms.
4️⃣ Rest the dough – Cover and let it rest for 30-45 minutes.
5️⃣ Roll, fold, and shape – Follow the same rolling and folding technique as traditional Gipfeli.
6️⃣ Egg wash and bake – Brush with egg (or a plant-based substitute) and bake at 180°C (350°F) for 20-25 minutes.
📌 Result: A slightly denser, heartier Gipfeli with nutty, rich flavors and a bit of crispiness.
2. Vegan Gipfeli: Dairy-Free & Egg-Free Alternative
Traditional Gipfeli rely on butter, milk, and eggs for their flaky texture and golden crust, but you can easily make a vegan-friendly version with a few smart swaps.
A. Vegan Ingredient Substitutes
| Traditional Ingredient | Vegan Alternative |
|---|---|
| Butter | Vegan butter or coconut oil |
| Milk | Almond, soy, oat, or coconut milk |
| Egg Wash | Plant-based milk, maple syrup, or aquafaba |
B. Choosing the Right Vegan Butter
Opt for high-fat vegan butter (with at least 80% fat content) to ensure proper layering and flakiness.
Brands like Miyoko’s, Earth Balance, or Naturli work well.
Avoid margarine with too much water, as it will make the dough soggy.
C. Vegan Gipfeli Recipe
Ingredients
- 300g (2 ½ cups) all-purpose flour
- ½ tsp salt
- 2 tbsp sugar
- 120g (½ cup) vegan butter
- 150ml (⅔ cup) almond or oat milk
- 1 tbsp lemon juice (improves dough softness)
- 1 tbsp maple syrup (for a natural hint of sweetness)
Instructions
1️⃣ Mix dry ingredients – Combine flour, salt, and sugar.
2️⃣ Cut in vegan butter – Rub the butter into the flour until crumbly.
3️⃣ Add liquid – Pour in plant milk and maple syrup, mixing gently.
4️⃣ Chill and laminate – Follow the same rolling and folding technique as traditional Gipfeli.
5️⃣ Shape and brush – Brush with plant milk or aquafaba for a golden crust.
6️⃣ Bake at 180°C (350°F) for 20-25 minutes.
📌 Result: A buttery, crisp, and golden vegan Gipfeli with a light, flaky texture.
3. Whole Wheat + Vegan: Can You Combine Them?
Yes! You can combine both modifications for a 100% whole wheat, vegan Gipfeli by:
Using whole wheat flour + vital wheat gluten for a lighter texture.
Using vegan butter for flakiness.
Adding extra liquid to keep the dough moist.
Brushing with maple syrup or plant milk for a golden crust.
📌 Tip: Whole wheat + vegan dough tends to be slightly drier, so increase hydration (milk or water) by 10-15%.
4. Best Fillings for Whole Wheat or Vegan Gipfeli
If you want to add extra flavor, try these healthy and dairy-free filling options:
Nut Butters – Almond butter, peanut butter, or cashew cream.
Dark Chocolate – Use dairy-free chocolate chips or cocoa spread.
Fruits & Jam – Raspberry, apricot, or apple compote.
Savory Options – Hummus, dairy-free pesto, or sautéed mushrooms.
📌 Pro Tip: Avoid overly wet fillings, as they can leak and soften the dough.
Final Thoughts
Both whole wheat and vegan Gipfeli are fantastic alternatives to traditional Swiss pastries. While they may have a slightly different texture, they still offer delicious, flaky, and buttery flavors without using dairy, eggs, or refined flour.
Quick Recap:
Whole Wheat Gipfeli – Healthier, slightly denser, with a nutty flavor.
Vegan Gipfeli – Flaky, buttery, and completely dairy-free.
Best Adjustments: Add extra moisture, choose high-fat vegan butter, and blend flours for balance.
Great Fillings: Nut butters, dark chocolate, fruit jams, and dairy-free pesto.
Can I Freeze Homemade Gipfeli?
Freezing homemade Gipfeli is a fantastic way to extend their freshness and enjoy them later without compromising texture or flavor. Whether you want to freeze unbaked dough, shaped Gipfeli, or fully baked pastries, there are different methods to ensure they remain flaky, buttery, and delicious after reheating.
1. Freezing Unbaked Gipfeli Dough
If you want freshly baked Gipfeli anytime, freezing the dough before shaping is a great option.
A. How to Freeze the Dough
1️⃣ Prepare the dough as usual, stopping before rolling and shaping.
2️⃣ Wrap tightly in plastic wrap, then place in an airtight freezer bag.
3️⃣ Label with the date – Dough lasts up to 2 months in the freezer.
B. How to Use Frozen Dough
- Defrost overnight in the fridge (8-12 hours).
- Roll, laminate, and shape as usual.
- Allow for extra proofing time (if yeast-based) before baking.
📌 Tip: If your dough contains yeast, don’t leave it frozen for too long, as yeast can lose its rising power over time.
2. Freezing Shaped (Unbaked) Gipfeli
Freezing shaped Gipfeli is one of the best ways to enjoy freshly baked pastries anytime.
A. How to Freeze Shaped Gipfeli
1️⃣ Prepare and shape the Gipfeli as usual, stopping before the final proofing.
2️⃣ Place them on a baking tray lined with parchment paper.
3️⃣ Freeze uncovered for 2-3 hours until solid (this prevents sticking).
4️⃣ Transfer to a freezer bag or airtight container.
5️⃣ Label and store for up to 2 months.
B. How to Bake Frozen Gipfeli
- No need to thaw! Simply place frozen Gipfeli on a baking sheet.
- Brush with egg wash (or plant-based alternative).
- Bake at 180°C (350°F) for 5-7 minutes longer than usual.
📌 Pro Tip: Let the frozen Gipfeli sit at room temperature for 15 minutes before baking to improve flakiness.
3. Freezing Fully Baked Gipfeli
If you’ve already baked your Gipfeli but want to keep them fresh, freezing is a great way to preserve their texture.
A. How to Freeze Baked Gipfeli
1️⃣ Let them cool completely before freezing (to avoid sogginess).
2️⃣ Wrap each one individually in plastic wrap.
3️⃣ Place in an airtight container or freezer bag.
4️⃣ Freeze for up to 2 months.
B. How to Reheat Frozen Baked Gipfeli
- Oven method (best results): Bake at 160°C (320°F) for 8-10 minutes.
- Air fryer method: Heat at 150°C (300°F) for 5-6 minutes.
- Microwave method (not ideal, but quick): Heat for 20-30 seconds, then toast in the oven for a crispy finish.
📌 Pro Tip: Always reheat in the oven for the best flaky, crisp texture!
4. Does Freezing Affect the Texture of Gipfeli?
- Unbaked frozen Gipfeli retain their flakiness and rise as long as they’re properly proofed before baking.
- Fully baked frozen Gipfeli might lose a bit of crispiness, but reheating in the oven restores their texture.
- Avoid freezer burn by wrapping them tightly and storing them in an airtight container.
5. Quick Freezing & Reheating Guide
| Freezing Method | Storage Time | Reheating Instructions |
|---|---|---|
| Dough (Unshaped) | Up to 2 months | Thaw overnight, then shape & bake. |
| Shaped (Unbaked) | Up to 2 months | Bake directly from frozen (add 5-7 min). |
| Fully Baked | Up to 2 months | Reheat in oven at 160°C (320°F) for 8-10 min. |
Final Thoughts
Best for freshness: Freeze shaped, unbaked Gipfeli and bake them fresh.
Best for convenience: Freeze fully baked Gipfeli and reheat quickly.
Avoid sogginess: Always let them cool before freezing and reheat in the oven.
1 thought on “How to Make Authentic Swiss Gipfeli from Scratch”